We can say that the default photography application in macOS, to order and catalog our photos, meets at least its essential premises. With her you can catalog all the photos that we want to store on our Mac and sort them by dates, albums created by us and even face detection for less location.
On the other hand, we have two accessories. One of them is the part of Extensions, where developers of photo editing applications, allow access to their application in order to edit them to our liking, and on the other hand, macOS features.
And thanks to these functions, We can, among other things, add the place where these photographs were taken. This is very useful, if you want to find photographs that you took in a specific place. Nowadays, if we have activated the location on mobile phones, this location should be by default in the photographs and they pass to our Mac when importing them. But other cameras, like some reflex cameras, don't have to carry geolocation information.
Therefore, we must locate the photographs that do not have this information and once located, by groups of the same location, we will add the address in the most precise way. To do this, we will use the Smart Photo Albums. For it:
- Open Photos.
- Press File and then New smart album.
- Now we must select the parameters to create an album where the photos that do not carry are located geolocation. Therefore, we can a name like: no location.
- In the three drop-down that appear under the text Fulfills the following condition, we select:
- Photos
- It is not / is.
- GPS tagging.

We give it to accept and the album is created with all the photos without location. Remember that the intelligent surname, means among other things that, the photo that we add the GPS information will disappear from this album and the one that is included without information, will appear in it.
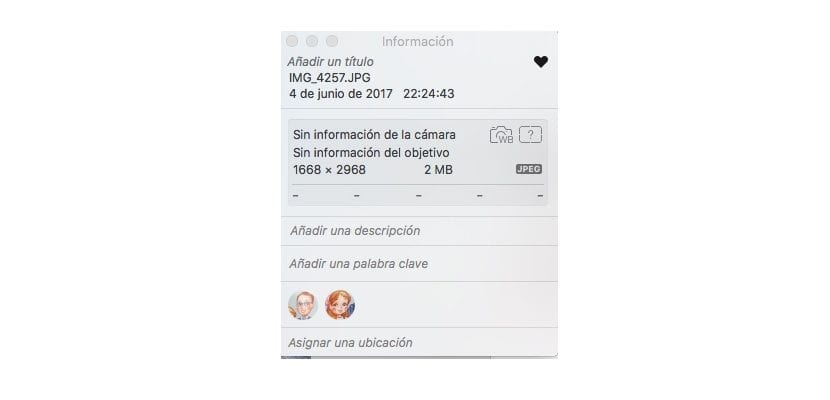
Now we must select all the photos in this album, without location, from the same place. With them selected, click on Cmd + i. Now a menu opens, where the last option is: assign a location. Here we must enter the address, as accurately as possible. The site in question should come out, but a suggestion if it doesn't come out the first time. Open Maps and find the name that Maps uses, copy and paste it in the previous section and you will have it archived by its exact location.