Well here is my second Photo Tutorial, this time about how to solve the malfunction of the mythical ball of our Mighty Mouse. It is a mouse that Apple "perpetrated" not long ago and it is still valid in the market. This photographic tutorial is valid for both the BlueTooth version and the USB mouse (with the only difference that the USB does not require removing the batteries).

We are going to proceed with the disassembly and incidentally we are going to make a small MOD (described at the end) to be able to disassemble it somewhat faster in the future.
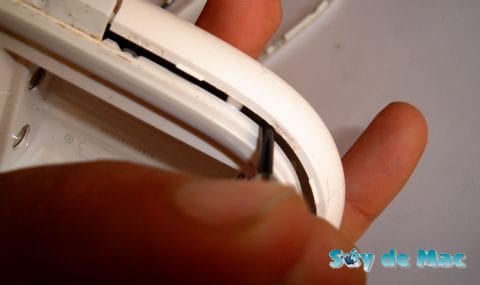
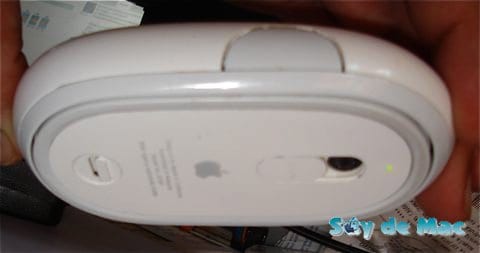
First, with a finite screwdriver we go through the groove of the base to take off the ring.
We are careful not to leave marks.

Now, with the help of the same screwdriver, we pry to the side just where the axis of rotation is between the base and the casing to free one of the bolts.
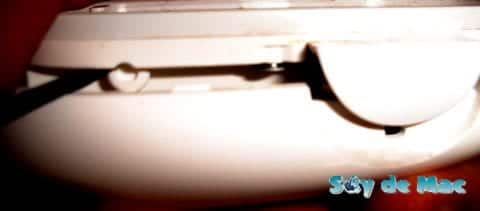
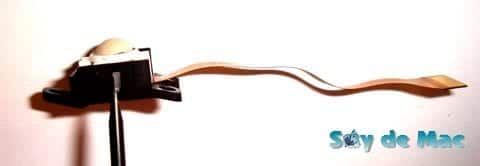
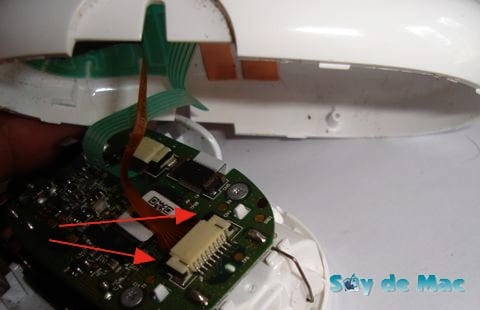
We are careful when lifting the case as there are two straps of cables that connect it to the base.
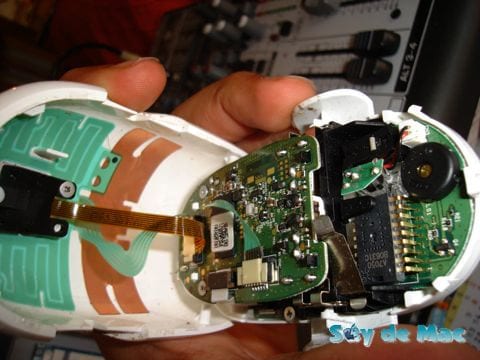
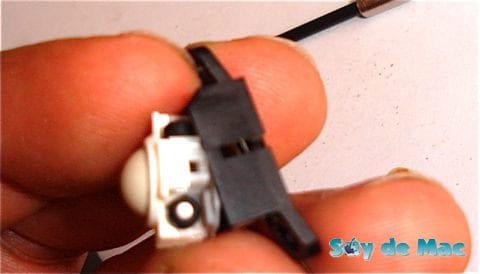
We remove the cable that connects the base with the ball mechanism by first pulling the black clip to release it.
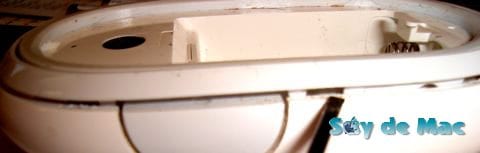
Once the three screws that hold the mechanism of the ball to the housing have been unscrewed, we see that on the sides of the box there are two notches that we have to push slightly upwards.
… And we took the complete mechanism out of your site.
We remove the rollers from their place regardless of remembering where they were going since they are all the same ...
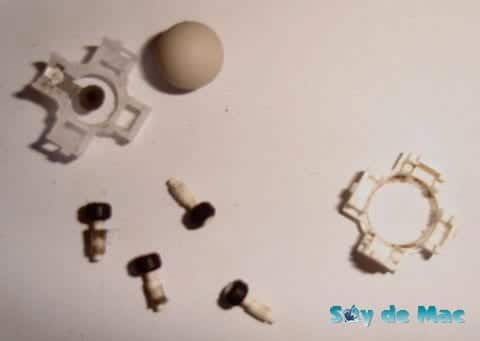
… And we clean them first with a fingernail or a soft plastic pick and then with a cotton swab and WATERsystem. (No alcohols since they can deform the roundness of the shafts)
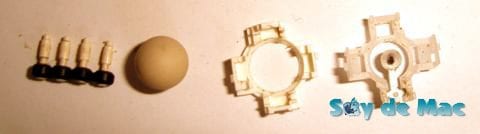
Once all the components are clean, we reassemble the shed remembering that the rollers go to the right sides of each of the axes (looking down).
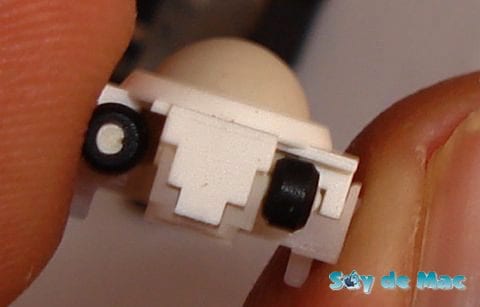
Remember also that this side that you see in the photo above is the one seen from the only opening that the black box has, that is, where the cable strip enters.
We put the assembly back in its place in the case and fix it with only two screws (optional) and the third one we lose as I did the first time I disassembled the mouse (look at the fifth photo starting at the top) ... Well, it goes , this is a joke;) ... if you keep the three screws because you have been careful not to work at the edge of the table, put all three, but if you only have two left, as is my case, you fix the center and one of the sides as they perfectly hold the whole.
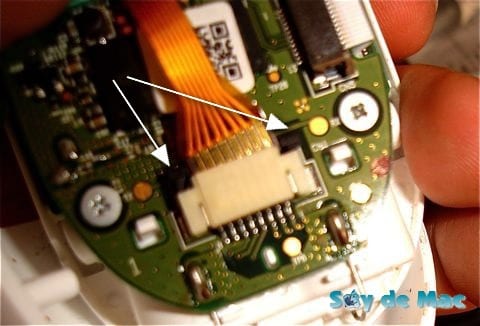
Now remember to plug the strap in place with the metal part (gold) facing up and push the black clip on the points indicated below to fix the cable well.
Once the cable has been fixed and verified that it is firm by pulling slightly, we proceed to fit the shafts by putting one first in its place on the base and we help the other by prying the casing out with the screwdriver while lightly pressing the set with our hand until come in.
Now that everything is closed, we only need to place the ring in its place but in order not to have to glue it, we are going to make the following MOD.
With some fine pliers we deform very slightly towards the outside, the tips of the plastic projections that enter the inside of the mouse as you can see in the photo below.
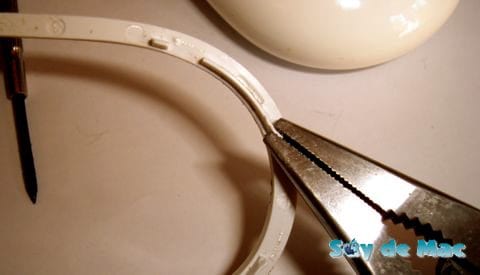
In this way, the projections will exert the necessary pressure to keep the ring in place without falling off during normal use of the mouse.
Now we put the ring in place and check that it does not fall. If necessary, go over the ridges with the pliers.
This has been all friends ... Just comment that now I'm writing this post while I lower and upload it with the Mighty Mouse ball in the photo and it goes smoothly.
Note: In a previous post I commented that to repair the ball it was worth sucking it and turning it a lot until it dries, on the other hand, when the dirt is already too much and it begins to come out around the edges, you have to resort to the procedure described here.
SaludOSx and scrolling in all directions! 😉

Thank you very much, I save the 69 that the wireless that I wanted to buy is worth since I did not know how the hell to open it…. Also, all the information has helped me a lot, but I do something to reposition the rollers and place the entire package of ball and rollers in the correct position (I already did it the other way around and I had to look at the tutorial again)
Mine is wired and I have performed the operation "open heart": without even disconnecting the cable from the mechanism of the ball and using the mouse while working on his guts to go looking and moving the tutorial ...
what a pleasure to scrolling in all directions again ...
Greetings and thanks again!
Jordi
Care and precision must be taken when repositioning them. Before closing check that they all rotate
Fantastic ¡¡¡, it works again, the tutorial is very good, Thanks ¡¡¡
Great. It drove me crazy looking for how to open the damn mighty. He knew what the problem was and how to fix it, but he couldn't access the guts. The explanation is perfect, without a doubt. The MOD, great too
And to think that I achieved the same thing just by passing an ERASER on the ball and WITHOUT GUTTING ANYTHING.
Try to believe.
Sometimes they send us to surgery and we just have a fever.
Thanks man, I used your tutorial a lot to repair the mouse that they threw in my work, finally I repaired it, now it is from the PM and on my mac hahaha
I cleaned it today as I usually do: a drop of alcohol and rub the ball on a cotton shirt. now the scroll works perfectly in all 4 directions but the central button located under the ball has stopped working. Can anyone tell me how to fix it? My iMac is less than a year old… if I call technical service, will they replace this mouse with a new one?
THANKS TO MOPSY… ..I WAS GOING TO GUT IT BECAUSE IT DIDN'T WORK FOR ME… BUT I TRIED THE ERASER, AND IT WORKED FOR ME.
OK..I ADVICE TO TEST IT BEFORE DOING SURGERY ..
Thank you very much for the tutorial jaca 101 !!!!!
I followed the steps and everything has turned out as indicated. The only downside was the hoop at the end. As much as I try to place it by bending the tabs a little, it does not look good because of the cable. What could I stick it with? Because if I hit it with Loctite, I won't be able to open it any more without breaking it, right ????
All the best!!!!!!!
Well, it seems interesting to know that I can disassemble the mouse at an extreme moment, however I was able to solve this problem of the displacement of the ball with adhesive appointment, I placed it in a cross and I glued it on a surface (the rubber is up) at the ends of the cross with more adhesive tape and then I turned the ball in the 4 directions, then in a circle and problem solved.
But if this did not work for me in the future I think I would risk opening it, if all the mac people always send you to buy another. Thank you very much for sharing your knowledge, it is a relief and gives us hope.
Thanks compa, I'm going to try it, regards