
As you all know, Continuity is a new name that Apple has given to a set of features within OS X Yosemite, one of them and perhaps the most striking is Hand-Off, this allows follow the work or tasks you have pending on your iOS device directly on your Mac or vice versa. This is something very useful if, for example, on the way home we start to write an email and when we arrive we want to continue it on the Mac for greater comfort or use your favorite applications in another area, be it numbers, maps, messages ... This feature is available willingness of developers so that in the near future, it is expected, integrate it into their applications.
PREVIOUS STEPS
However, we have a negative aspect in this great incorporation to the system and that is that not all Macs are input compatibleIn other words, those who do not have version 4.0 Low Energy of the Bluetooth protocol will not be able to activate this functionality… until now.
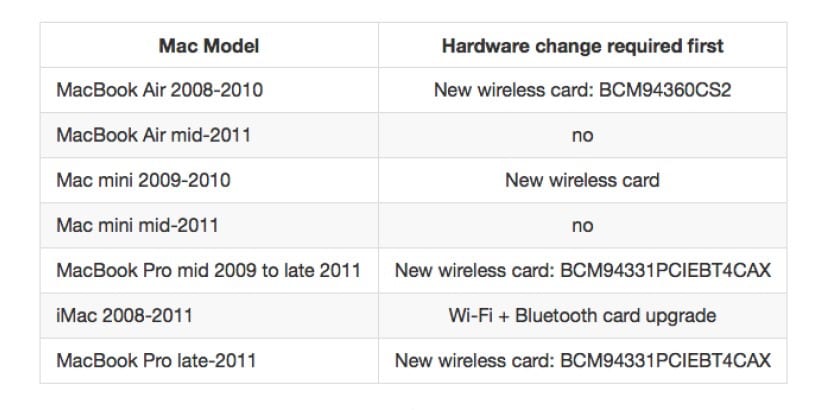
I highlight the "so far" because thanks to a project on Github it has been possible to create a kind of tutorial where they indicate some steps to follow to be able to activate it on those Mac that are not intended to use this feature. Here is the list of Macs that will require a hardware change so that this function can be activated, except for the 2011 MacBook Air and the 2011 Mac mini, which will not need to be updated, but it will be necessary to apply the tool and follow the steps necessary from the tutorial to get it.
The first thing would be to download the tool from GitHub through from this link and follow the steps indicated there, that is, download and open the .ZIP file, double-click on the application and follow the instructions on the screen, ignoring the message to allow access to accessibility options if it appears. Once the activator has been downloaded and executed, we will enter the administrator password to leave everything ready to follow the tutorial.
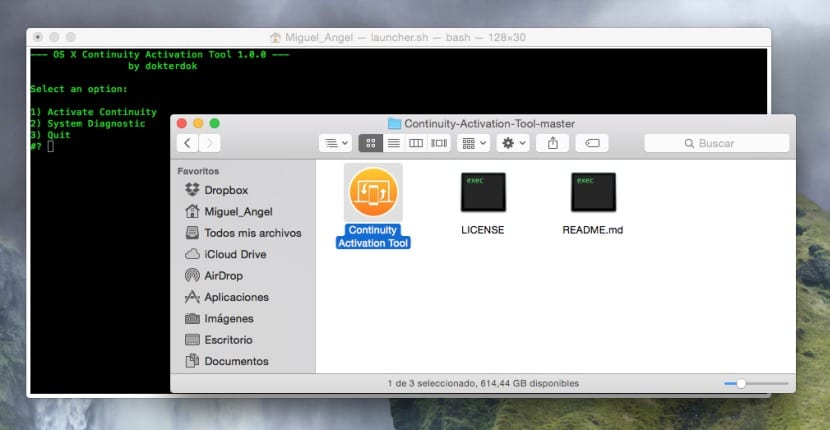
The options that we will see are the following:
- Activate Continuity: Starts the activation process and performs compatibility tests.
- System Diagnostic: Starts the compatibility diagnosis of the system on which it is to be run.
- forceHack: Starts the activation procedure and skips the compatibility checks. (It seems that in the last beta2 of the activator they have removed it).
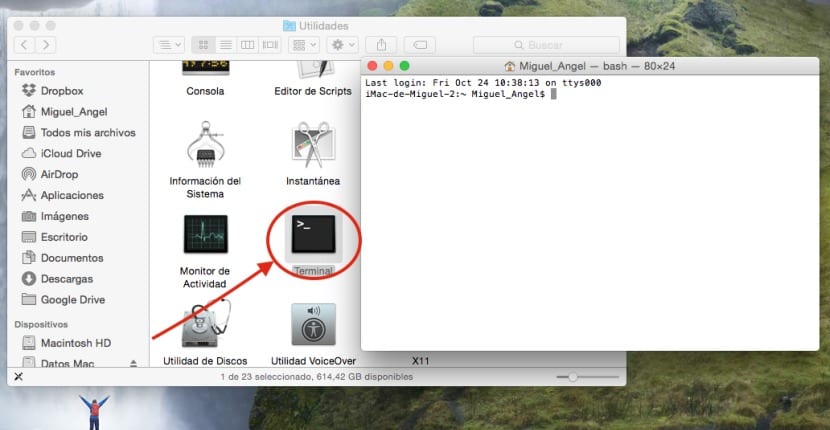
From this point we will start with the tutorial. With the activator open in this version of it, it is no longer necessary to modify the Kext, which are basically the drivers, since the app will do it directly for you. If, on the other hand, you tried it before if this version, you will need to return said kext files to their original state, so you must follow these steps in the terminal of the equipment before executing the activator ... You will find the terminal in Utilities> Terminal:
- sudo nvram boot-args = »kext-dev-mode = 1 ″
- Restart the mac
- Delete the old kexts in / System / Library / Extensions /
- sudo kextcache -system-prelinked-kernel
- sudo kextcache -system-caches
- Repair disk permissions in Utilities> Disk Utility
- Restart the mac
- Use KextDrop to backup some
- sudo kextcache -system-prelinked-kernel
- sudo kextcache -system-caches
- Repair permissions
- Restart the Mac
Once this process is finished (if you had already tried something, otherwise we will start from here), the first thing will be to download and install this 0xED from this link:
Click here for download the oxDE.
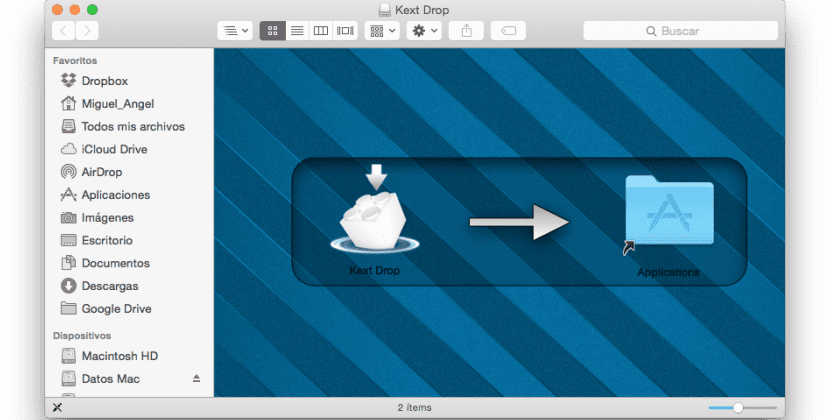
The next step is to download and install KextDrop in the applications folder from this link:
Click here to download KextDrop
The next step is to repair the team's permissions in Applications> Utilities> Disk Utility> Repair Permissions. Then we will open the terminal and enter the following command:
sudo nvram boot-args = »kext-dev-mode = 1 ″
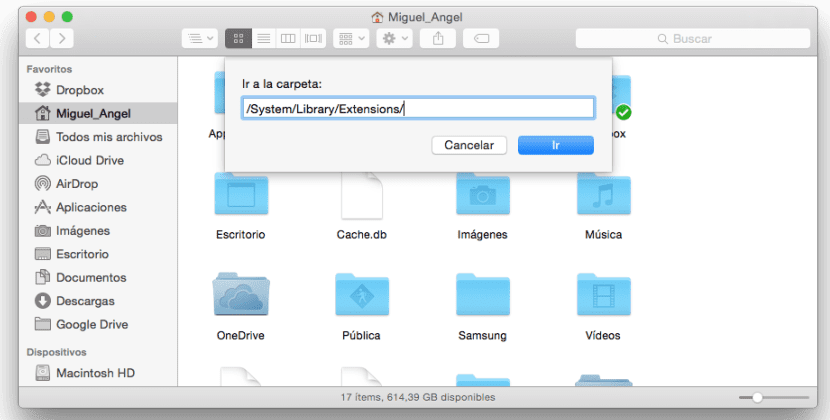
Next we will restart the computer, once done we will open the finder again and press CMD + Shift + G to open «Go to the folder» and we will enter the following path:
/ System / Library / Extensions /
0xDE (Hexadecimal Editor)
Copy all the files in that folder to the desktop and delete them all. It is also recommended to make an extra backup in another folder of these two files in case they are needed:
- IO80211Family.kext
- IOBluetoothFamily.kext
Now in the terminal we will enter these commands in the order indicated:
-
sudo kextcache -system-prelinked-kernel
-
sudo kextcache -system-caches
RESET THE MAC (Wi-Fi connection will not work)
-
ioreg -l | grep "board-id" | awk -F \ "'{print $ 4}'
This will return a result similar to »Mac - 742912EFDBEE19B3» although yours may be different. Copy this result and don't close the terminal yet.
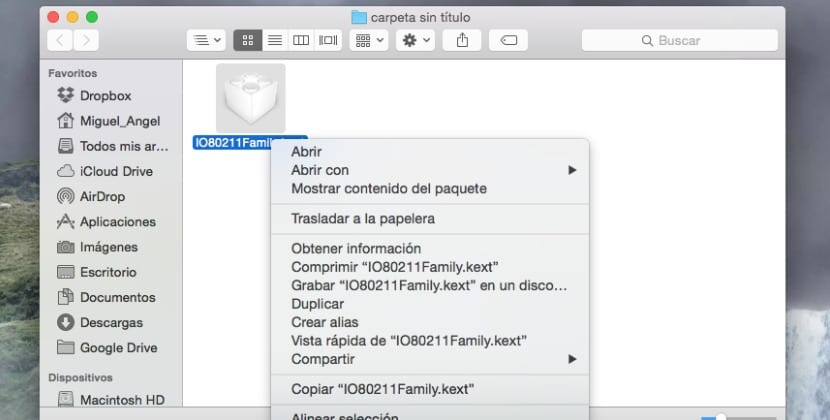
We will go to the desktop and mark the file IO80211Family.kext and with the right button (CMD + Click) we will click on Show package content, we will go to Contents> Plugins and we will repeat the operation with the AirPortBrcm4360.kext file, that is, right click and show package content, once inside we will go to Contents> MacOs
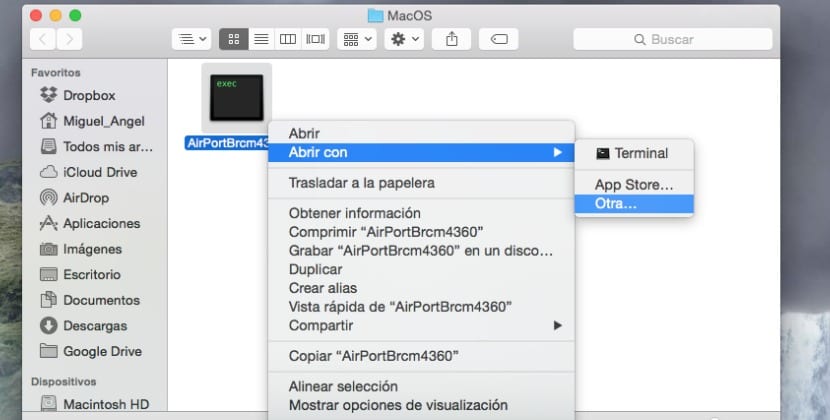
Inside this folder, we will right-click on AirPortBrcm4360 then »Open With» .. Another and we will choose oxDE
.
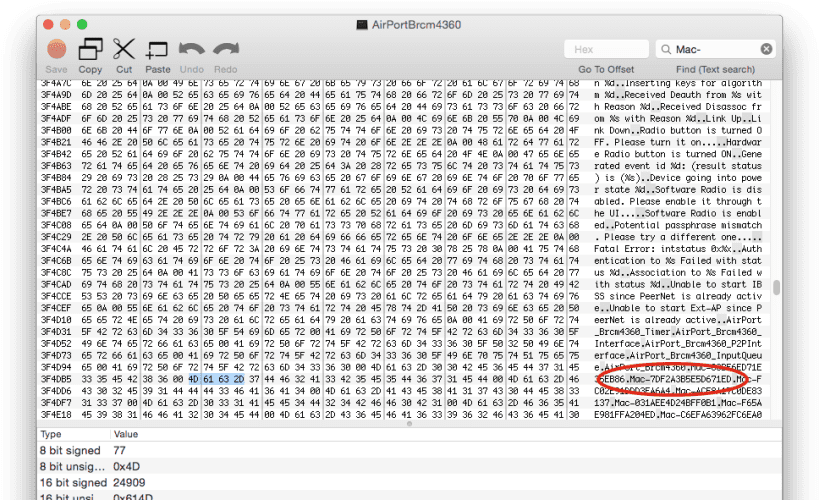
Now in the search box in the upper right corner of the screen as you can see in the image below, we will put the search term »Mac-» (without the quotation marks). It should appear something like Mac-00BE6ED71E35EB86, edit that file and delete all the numbers in the name and enter the numbers that appeared when the result was returned in the terminal a few steps higher careful not to leave us any, or enter anything wrongly. According to my example it would look like this, Mac - 742912EFDBEE19B3 but yours may be different.
When we have completed it, inside the search we will go to the last Mac - (for example Mac-2E6FAB96566FE58C) and repeat the operation putting the result back from the terminal just like we did before, i.e Mac - 00BE6ED71E35EB86.
Now we will click on IOBluetoothFamily.kext, Show package content and we will go to Contents> MacOS repeating the same operation as with the previous file, that is, right click .. open with and choose another> oxDE. Now in the upper search corner we will enter MacBook Air where we will find a code block such as this:
‘MacBookAir4,1»MacBookAir4,2»Macmini5,1»Macmini5,2»Macmini5,3’
We will manually replace the team numbers To make them look like this, it is important to pay attention not to make mistakes:
‘MacBookAir1,1»MacBookAir1,1»Macmini1,1»Macmini1,1»Macmini1,1’
We will press the red button and close oxDE
KEXTDROP
From here we will start using KEXTDROP that we previously downloaded. We will use the file IO80211Family.kext that we have already modified and we will drag it to KEXTDROP pressing then install.
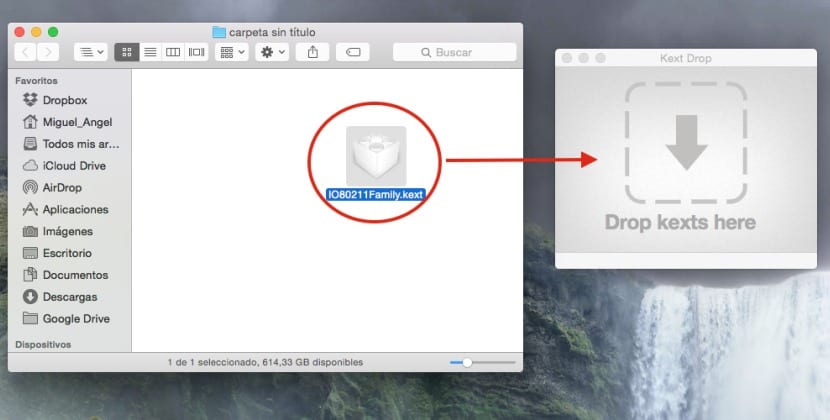
We will repeat the process with the modified file IOBluetoothFamily.kext. With this done, we will return to the terminal and enter the following commands until the end:
-
sudo kextcache -system-prelinked-kernel At this point we will see messages like:
kext-dev-mode allowing invalid signature -67061 0xFFFFFFFFFFFEFA0B for kext IOBluetoothFamily.kext kext-dev-mode allowing invalid signature -67061 0xFFFFFFFFFFFEFA0B for kext AirPortBrcm4360.kext
-
sudo kextcache -system-caches
-
nvram -p | grep "kext-dev-mode" | awk -F '=' '{print $ 2}'
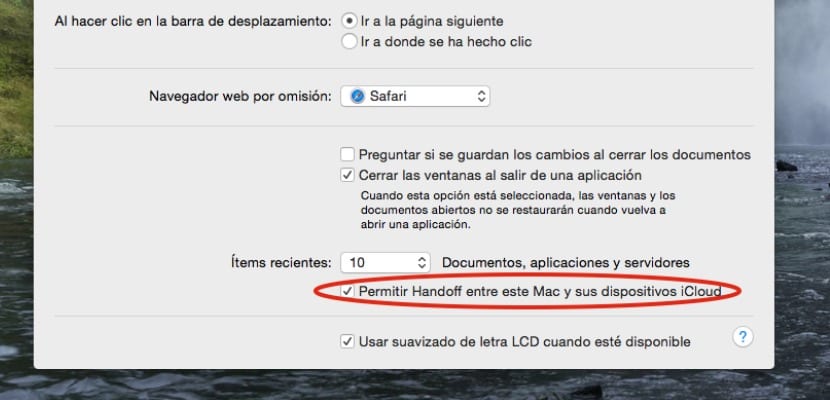
We will restart the Mac and we will make sure we have Wi-Fi and Internet connection if everything went well. Now we will go to System Preferences> General and activate HandOff.
If it is not available, something has gone wrong and it is necessary to put your original .kext back in its place, hence the backup of the files, therefore we will do the following in Terminal:
- sudo kextcache -system-prelinked-kernel
- sudo kextcache -system-caches
We will exit iCloud by logging out of it both on our iOS device and on the Mac, we will restart both and then log back into iCloud again. We will repair permissions in disk utility.
Good Juan, what do I say ... not only Forocoches has this news published, right? Saying that is a lot to say mate.
Greetings 😉
That activation can be done by an expert in mac programming, a simple user like me, just by reading the steps to follow, I am left in limbo, I better forget about it and continue with my Mac from mid-2011.
I do not know if the news is published in Forocoches or not (I have not bothered to look at it) but I assure you that the tutorial is tested by me, with the images originally uploaded by me and absolutely written entirely by me on the basis of the English tutorial from the MacRumors forums, which is where it originally appeared. But I already tell you that the work is there and it has not been a short-stick at all.
Miguel, don't worry, most of us who follow this portal know that they work with quality, so my advice is to ignore the idiots and continue providing info from the mac world, greetings from Rep. Dom.
And I tried to do it and in one of the steps of restarting the computer it takes half an hour and it does not start 😱😱😱😱
The same thing happened to me and I had to format… 🙁 I don't know if I have done it wrong or it is poorly explained. I have made a backup copy of the drivers, but when I delete them from the folder where they should be, I have put the two commands that it says. At the time of starting he told me that tururú ...