
Today I had a small talk with Marten, the husband of a co-worker who asked me how he could get his sister, who was in another country, you could view photos of your family on your iPhone.
My response has been immediate and is that for those of you who do not know, from the Photos application on both macOS and iOS we can create two shared albums in iCloud with those people we deem appropriate and that, of course, have an Apple device, be it an Apple TV, a Mac, or an iOS device.
The first thing I have explained to Marten is how to manage the photographs in pictures and is that to be able to share photographs in shared albums we have to have those pictures imported to the Photos library. In this case we will explain how perform the procthat in the current system of the Mac, that is, the macOS Sierra.
Once the photos are imported, we have to select at least one so that we can create the first shared album. We follow the following steps:
- We select in the left sidebar the item PHOTOS so that the photos we have in the Photos application are shown to us.
- We select one of the photos that we want to add to the shared album and then we go to the upper bar on the right side and click on the icon with an exit arrow from a box, which means "ways to share that photo."
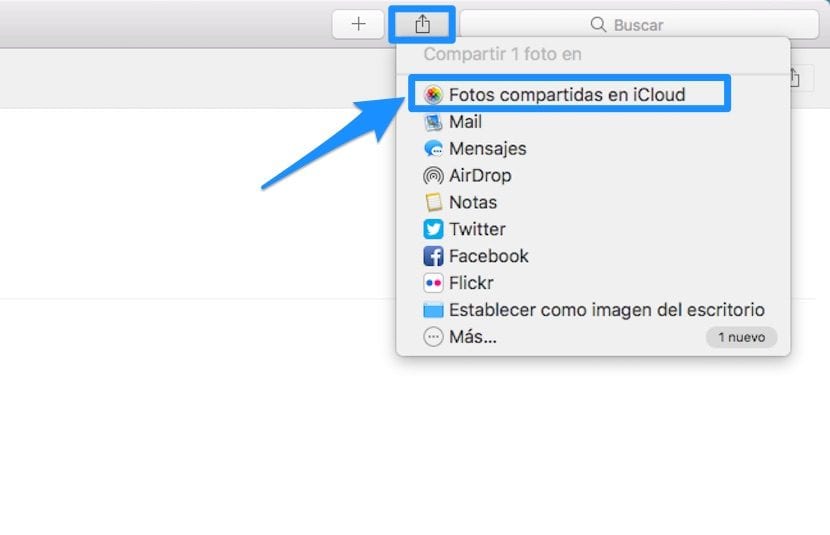
- We click on Photos shared in iCloud and a drop-down opens where the shared albums that we already have appear in addition to a small square with the + sign to create a new one.
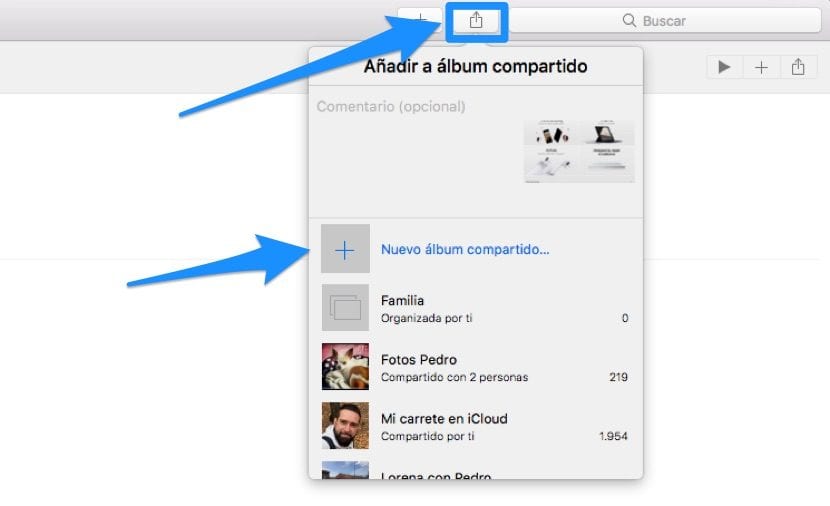
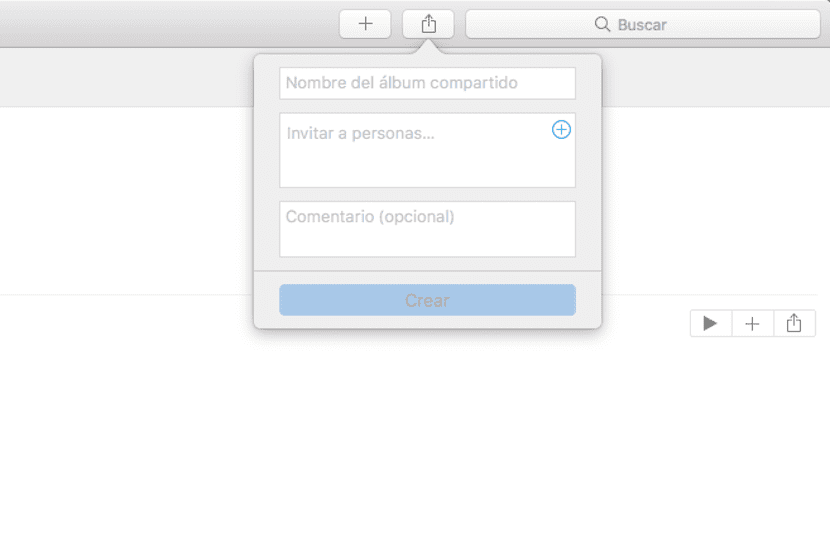
- Click on create new shared album and a window opens in which we put a title to the album, we add the people from our contacts that we want to invite to see that album and click on accept.
- At that time we already have a new album shared in our iCloud cloud with that first photograph. To add more photos to that album, we just have to go to the photo library of the Photos application and select the ones we want to later go to the same icon at the top (the one with the arrow coming out of the box) and in this case select the name of the album that we have already created previously.
So far everything is very simple, but the complication, or not, is adding new guests to an album already created or eliminating previous guests. The steps you must follow for this are:
- In the left sidebar of the Photos application we select in the "Shared" area the album you want to manage the guests and open it with a double click.
- You will see how a circular icon with a head appears on the top bar, in which you must click to manage everything that has to do with that shared album.
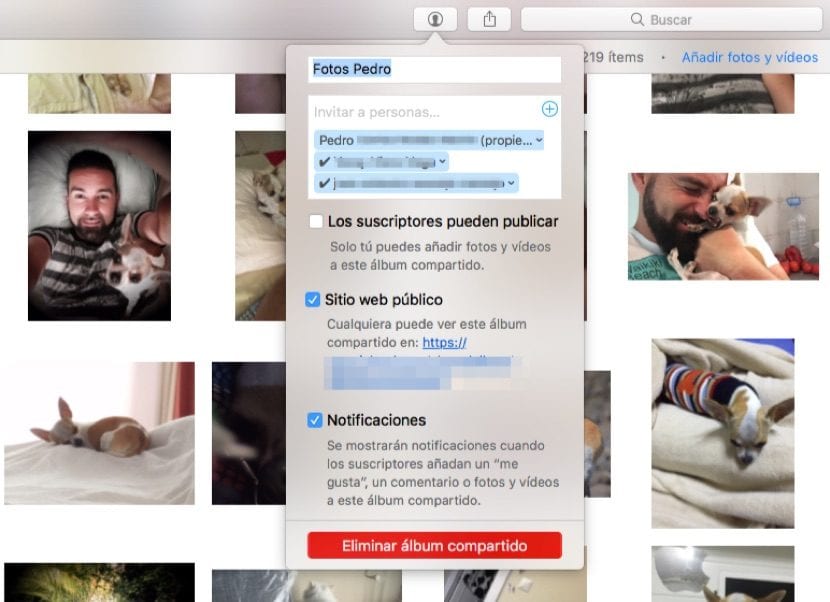
- You can change the title of the album, you can let the guests write about the photos in the album, you can add or remove guests or make the album publicly accessible through a web address provided to you.
So you can have many albums shared with your friends in which you can put photos that will automatically reach your friends' devices. share photos without having to send them by iMessage or WhatsApp, which as you know, in the latter they are compressed losing quality.
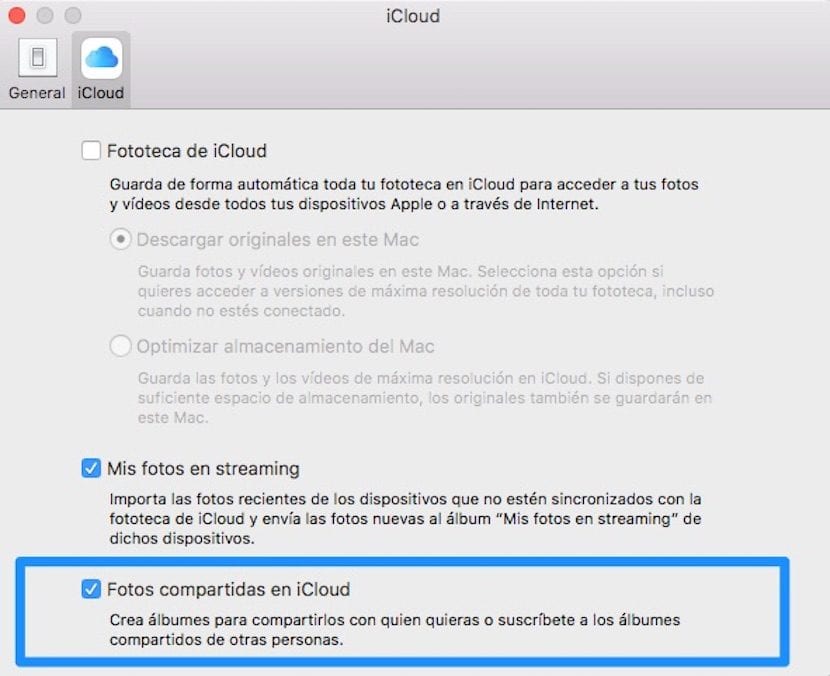
Now you just have to get down to work and start creating your first shared albums. Keep in mind that in order to do all this You must verify in the Preferences of the Photos application in the «iCloud» section that you have activated the option of Shared Photos in iCloud since otherwise nothing of what we have told you in this article will be available. Courage and if you have any questions, do not hesitate to ask me in the comment box of this article.
One question: do the guests see each other? Or can I only see them?