
Day by day new users are arriving to the Apple computer system, that is, to macOS High Sierra at the moment. In this case I have two co-workers who have come from two different devices, one with a 12-inch MacBook and a companion with a 10,5-inch iPad Pro.
Both are clear that they must make use of the Apple cloud to be able to manage the files correctly between their Apple devices and that is why I write this article, an article in which I am going to make it clear what you have to do if you want to work in an orderly manner with the files on your device between your devices.
When you activate a new Apple device, be it a Mac or an iPad, you will have to activate or not the syncing your files to iCloud. In the case of macOS High Sierra, you are informed in a pop-up window if you want the folders to Documents and Desktop sync with iCloud, so Since you say yes to that question, everything you put on a Mac in those two locations will be on the rest of your devices.
Therefore, you should have a plan B in case you do not want the space in the iCloud cloud to be overwhelmed by the accumulation of large files in the Documents folder or on the Desktop itself. By this I mean that you must have an order in the files that you are generating and you must have an order in the place where you deposit them. You must be clear about what you want to be synchronized with the Apple cloud and what you do not want.
What is clear is that if you enable iCloud for the Documents and Desktop foldersEverything you put in both locations will appear in the same folders on other Macs with the same enabled, and in the Files folder on iOS devices, be it an iPad or an iPhone. Therefore, if you want certain files not to be synchronized, that is, that they are only on your Mac, you must create a LOCAL path, a LOCAL folder on a path that won't sync.
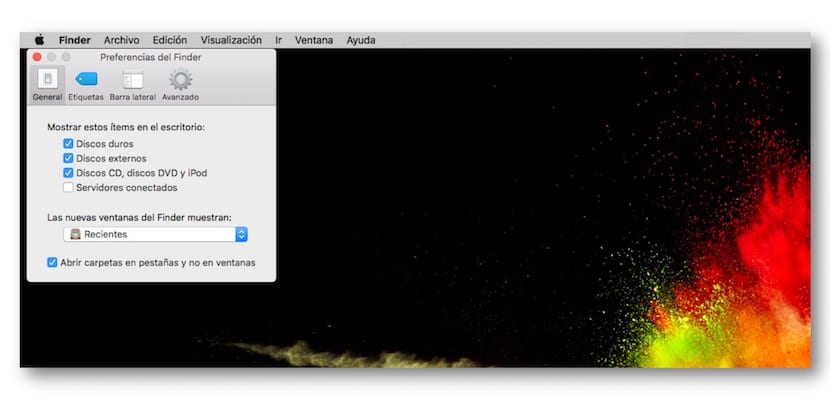
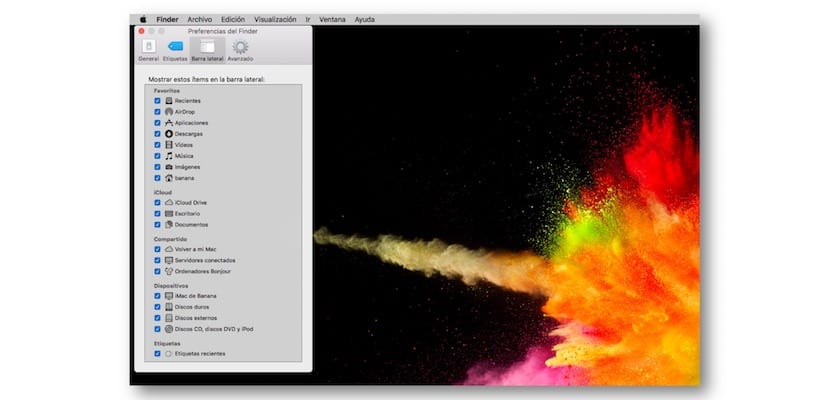
To do this, you just have to go to the Mac, locate yourself on the Desktop, then go to top menu> Finder> Preferences and check to show the Hard Drive on the Desktop. In addition, you can go to the Sidebar tab and in the process activate that everything that is synchronized with iCloud and the Music, Images and Videos items are shown so that the Sidebar of the Finder windows are richer and we can have those locations accessible.
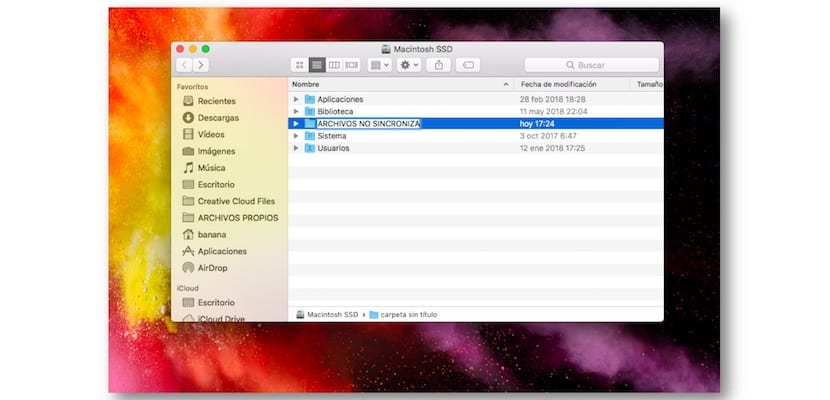
Now create the folder that is not going to be synced on the hard drive. You open the hard drive and in the first window you can create a folder that when you name it, to have it quickly accessible you must drag it to the sidebar to add it or to the Dock if you want access to it in the Dock. Everything you put in that folder doesn't sync with iCloud.
To finish you must go back to the Finder menu and deactivate the hard disk from being seen on the Desktop again to avoid problems with the deletion of certain files.