Let's not fool ourselves: change iPhone 4 screen It is a complicated task, somewhat heavy and requires skill and precision since we are practically going to have to disassemble the entire device, however, at this point we no longer have a warranty and we can find a similar second-hand device for the same price that it would cost us the official repair, perhaps it is a good time to experiment and test our skills.
Replace the screen of our iPhone 4
[box type = »shadow» align = »aligncenter»] WARNING: remember that this operation requires a lot of precision. If you are not willing to replace your iPhone with a new one, it is always advisable to go to the official Apple technical service or, failing that, to an expert. [/ Box]
What do we need?
Evidently what We mainly need to buy a new screen for our iPhone 4. We can find it in many places such as telephone repair shops and even in the already so famous Chinese websites and at a very good price. Make sure that the necessary instruments for replacement are attached to the screen: Phillips 00 screwdriver, plastic spatula and 1.3 flat screwdriver, otherwise you must purchase them separately. This is usually an "all inclusive" pack.
Once we have the replacement screen and the tools, we will follow the following steps with great peace of mind, attention and patience.
Changing the iPhone 4 screen
We start:
First we extract the SIM tray and then The first step will be to remove the back cover of the iPhone 4 by removing the two lower screws, sliding up and, once we see a small egg at the bottom, we lift it up and remove it.


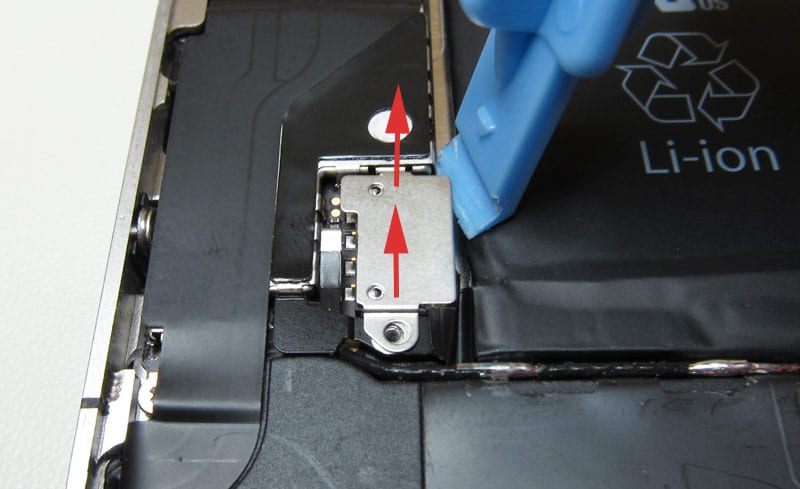
Next, we remove the screw that fixes the battery connector to the motherboard and, with the plastic spatula, we make a slight lever from the bottom of the connector upwards; We disconnect the battery connector and remove a small metal plate that protects the antenna connector:

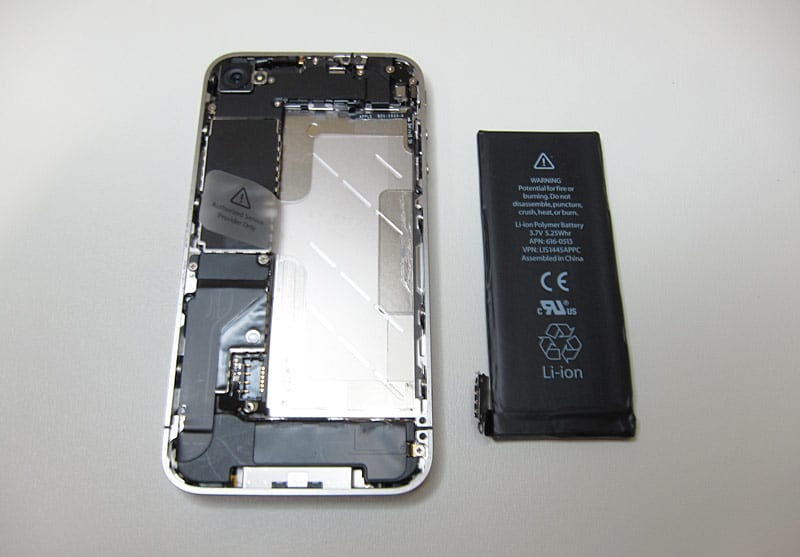
Now, using the plastic tab that you can see in the following image, we carefully remove the battery from the iPhone 4; Remember that, being glued, you will have to force yourself to remove it.
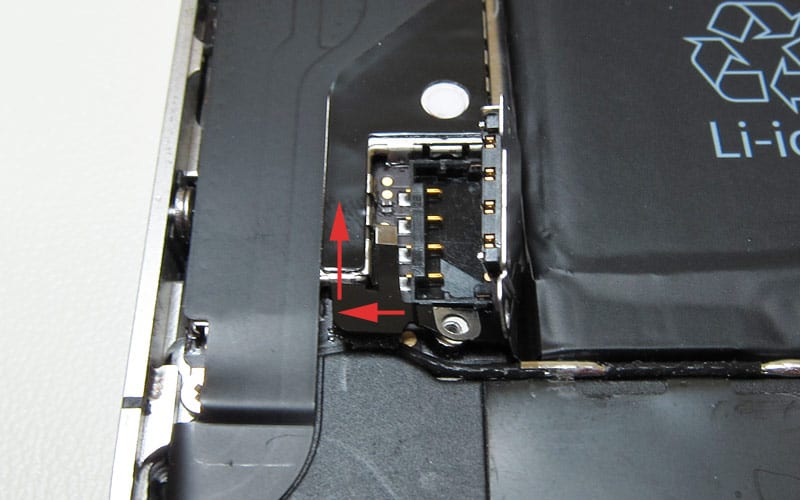
Now we unscrew the two screws that anchor the USB module cable to the motherboard and make a soft lever to separate the connector from the motherboard. Once we have disconnected it, we take it off very carefully from the motherboard:

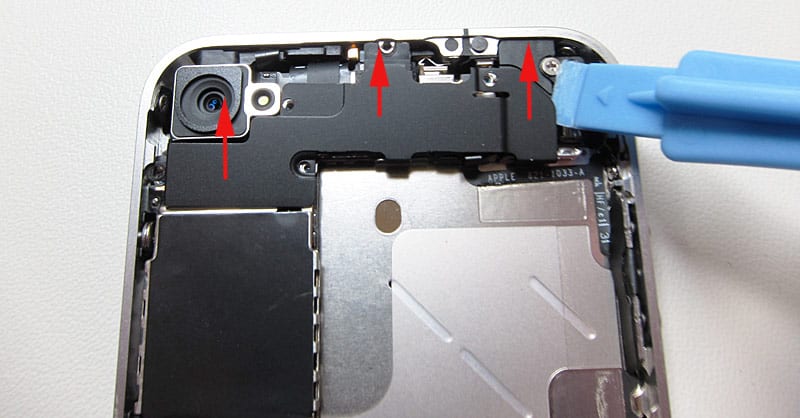
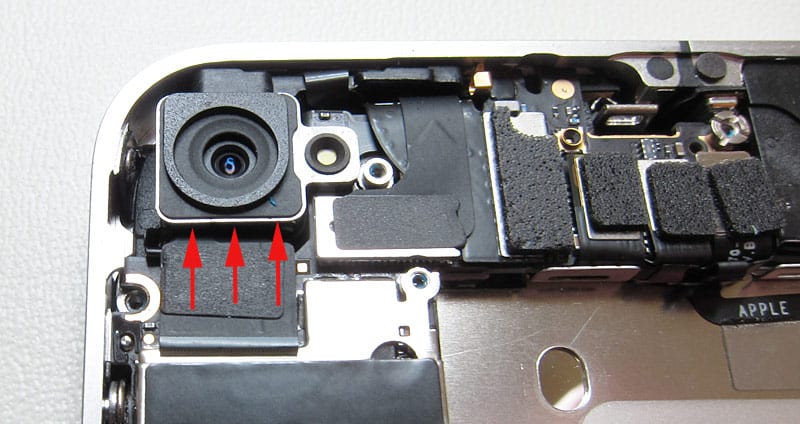
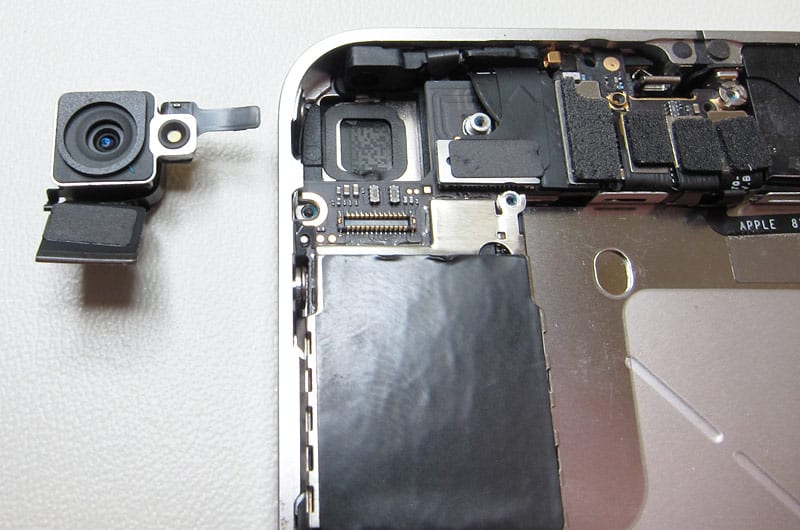
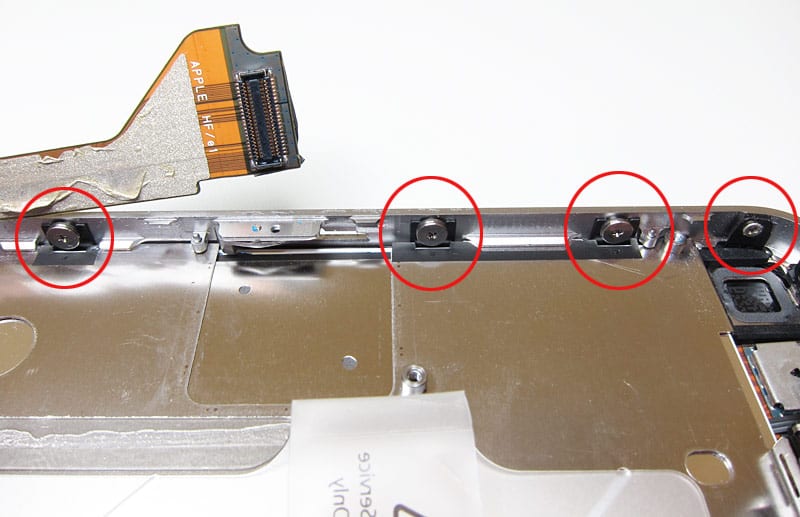
We continue. And now the screw "mess" begins. We go to the top of the iPhone 4, we remove the five screws and then the cover that protects the connectors and then, with the plastic spatula, we disconnect the connector from the camera and extract the body of the camera from its location: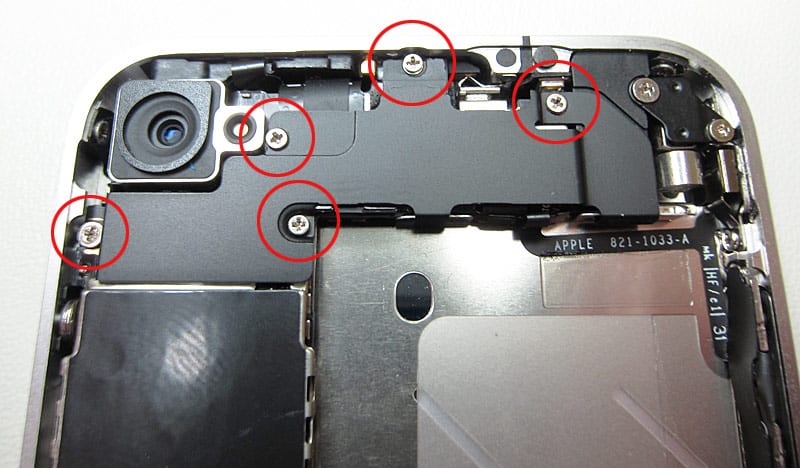
We remove the humidity sensor that we will see in the central part of the motherboard and the screw that we will find under it.

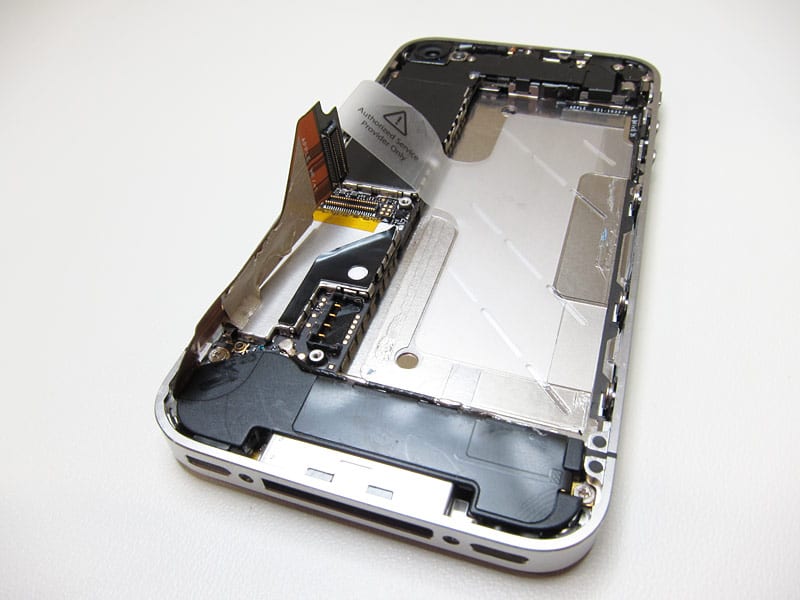
Now, again in the upper part, we disconnect the five connectors that we previously exposed and, with the flat screwdriver, we remove the last of the screws that hold the motherboard and the rest of the iPhone 4. Then we disconnect the antenna cable from the motherboard with the help of the plastic spatula, and we will be able to extract the entire motherboard by lifting it from the bottom and making sure that no connector remains connected.
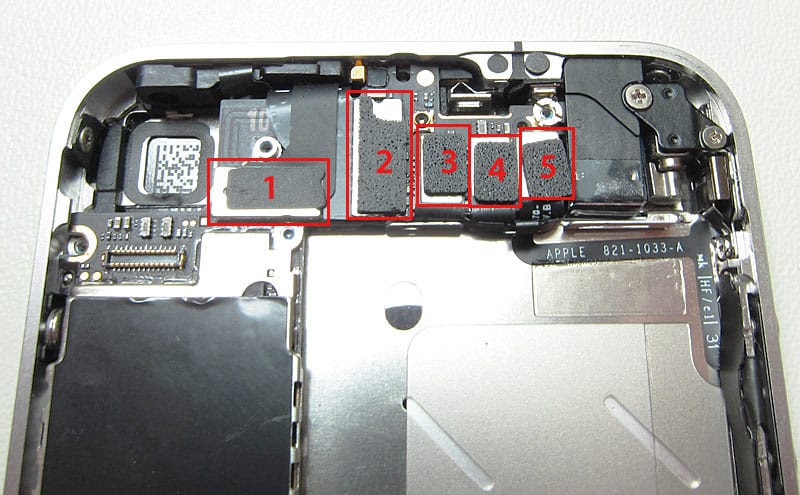


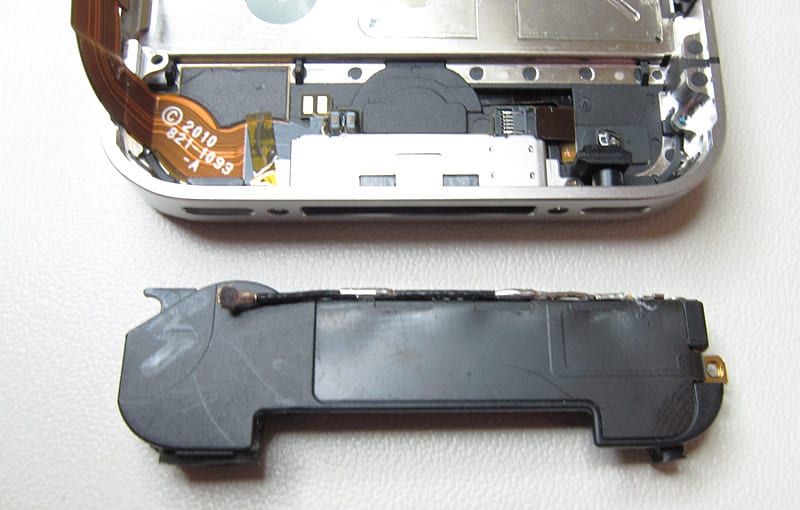
Now there is only one screw that fixes the USB module to the rest of the device. We remove it, and also remove the speaker module and the antenna by lifting it up and simultaneously moving it towards the side with care.


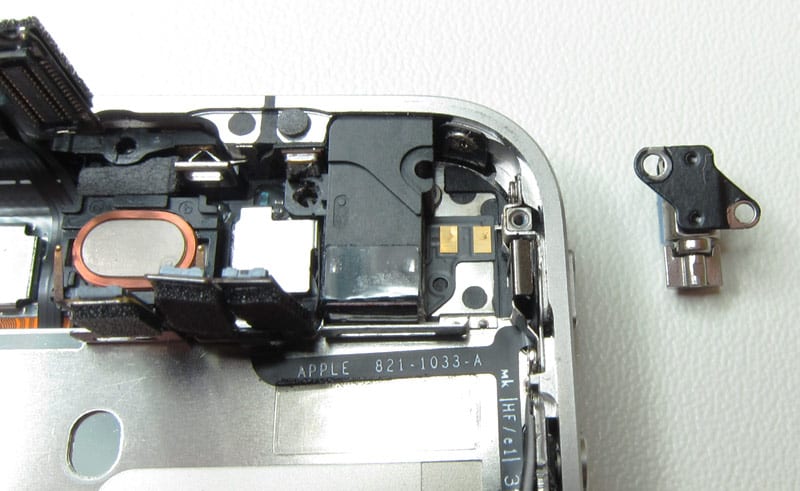
Now we remove the vibrator:
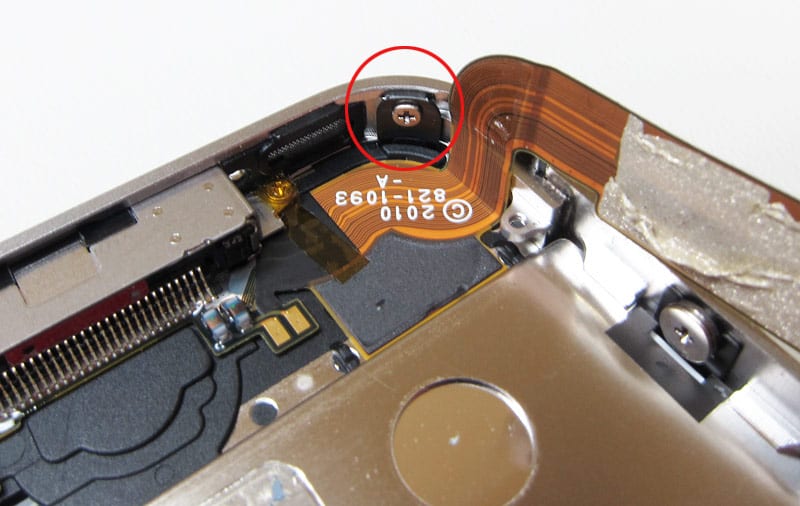
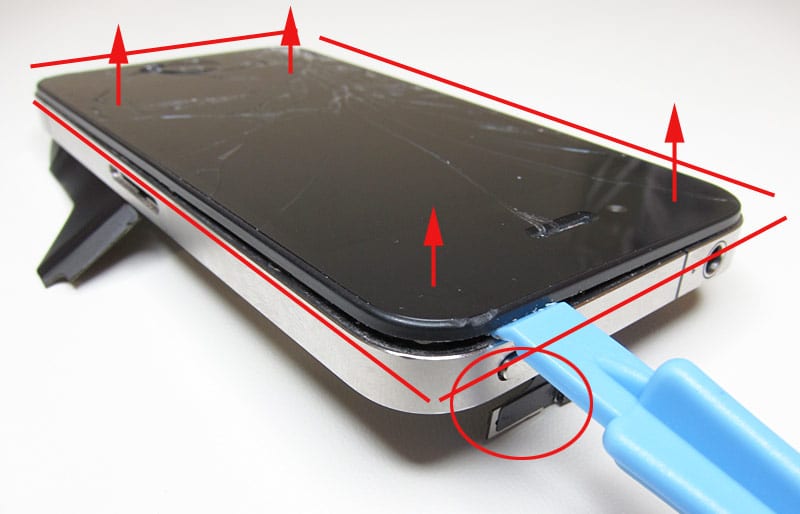
And we can now extract the last screws that fix the screen to the metal frame of the iPhone 4.


We can now remove the screen, slowly, carefully and with the help of the spatula. Once removed, make sure that there is no residue, glass fragment, etc.; make sure to get it clean before putting on the new screen.
Now you "only" have to place the new screen of your iPhone 4 and follow the whole process again but in reverse. Always make sure that everything is well connected, go slowly and calmly. It is preferable that you occupy a little more of your time now than later, once everything is reassembled, you discover that something is wrong and you have to open the terminal again.
And as seeing it is better than reading it, here you have a video tutorial prepared by Alberto Navarro for comohacer.eu where he perfectly explains everything we have seen previously.
And remember that in Applelised we continually update our tutorial section with new tricks, secrets, and even fixes like this one.
MORE INFO: ibrico.es
Really very complete, without waste, I liked it a lot, I think I am encouraged to change the screen ...