
One of the options we have available on Mac is convert our photos or images stored on the Mac to PDF format. In this sense, there are many options available and each user is free to choose those options that most interest him or that suit his way of using the equipment.
We can do it by native Apple applications such as Preview, through third-party apps or through online web pages. We can make these format changes in photos or in any image type file, so let's go with it.
How to convert our photos to PDF format
Before we start we have to clarify that this is a fairly simple action to carry out, you will not have problems of any kind to carry out this task and it is that the numerous options we have available they are enough for any user to do it.
This action shouldn't take a long time and we can be really quick and productive once we've done this action several times. The important thing is to learn the steps and actions necessary to do it using the tools that suit us best.
Photos to PDF via web page
This would be quite a method effective and fast to perform this action of changing the format for our photos. We started with this one because a few years ago I used it quite frequently since it allows you to do it from anywhere and it is not necessarily from a Mac or an iPhone.
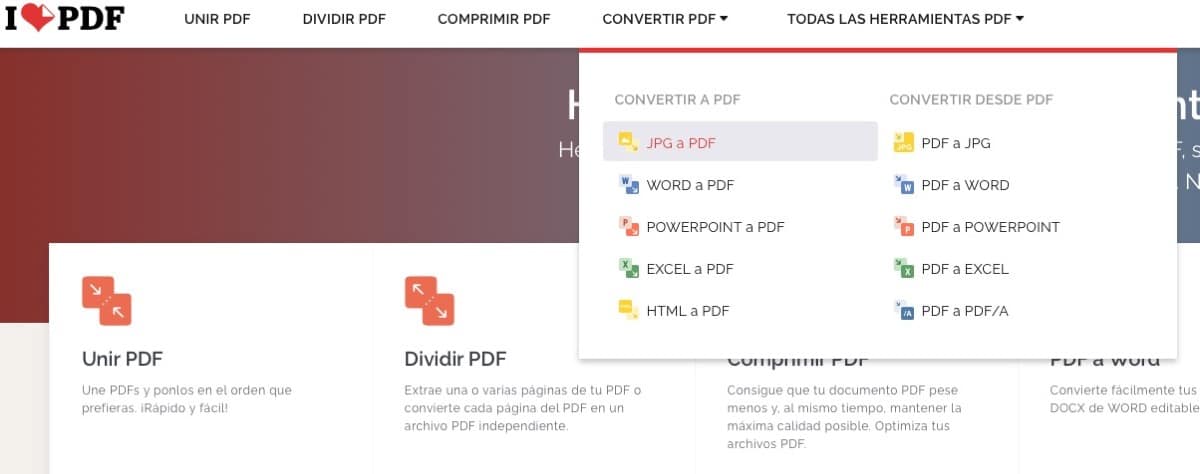
For this we have to access the website ilovepdf.com and directly click on the option in the upper menu bar «Convert to PDF». Once pressed, it opens a window in which it shows the different options that we have available and in our case it will be the first option: JPG to PDF. We can also see that it can be done in reverse and we can change the format of more types of files such as: Excel, Word, etc ...
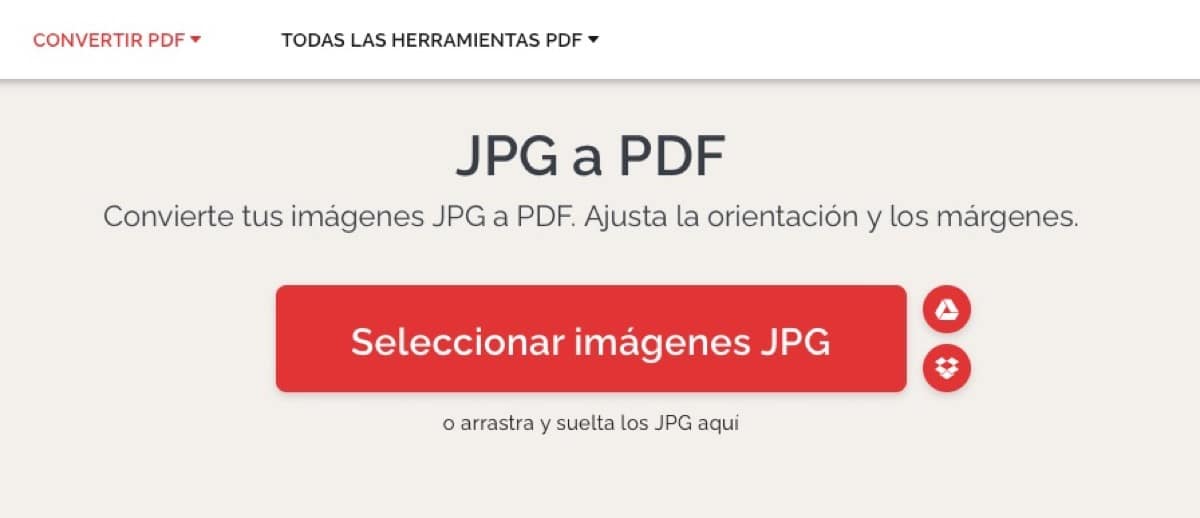
The web allows you to choose files directly from your computer, through Google Drive or even from Dropbox storage. This is really good as we have several options available for it. Once we click on the central button, we directly choose the image, we wait and that's it. We already have the photo in PDF.
Preview to convert photos to PDF
Without a doubt, the star of most users right now is Preview for this type of task. We can easily and quickly convert any file and format. In this case, the advantage is that we have the app installed on all Macs and we can use it whenever we want without the need to access any third-party website or application.
To carry out the action we have to enter Preview with the image. To do this, click on it and we will directly go to File. At this point we have to search the option "Export to PDF" which is at the bottom of the dialog box and once located we click on it.
This would be as I say my favorite option to perform this type of task. What's more if we have many photos to use we can select them all clicking on them and converting several photos to this format with a couple of taps. The images will be stored on the desktop or wherever we want using a specific location.
Through third-party applications

It must be said that this action with third-party applications is totally avoidable, that is, it is not really necessary to download one or more applications to carry out this conversion of the images or photos to PDF format as we have seen, but It is always important to mention some of the apps that we have available for this.
In this case we have chosen the PDF Element app but there are many with which this step can be carried out easily. In the case that you have a lot of JPG images and you want to transfer them to JPG this app is quite good and works for Macs in several old versions up to the most current one, macOS Monterey. In any case it's about following three simple steps with this app:
Open the tool on the Mac and in the Start window we see the "Create PDF" button. Here we have to select the JPG files on the computer and open them. It is also possible to access it directly from the "File" icon in the main menu, click on "Create" and then on the "PDF from file" option. In the next step we have the option to edit the PDF or not.
The JPG file will now appear as an image, but in a PDF format. The program then detects the image as scanned and therefore needs to perform an OCR in order to edit it. We click on the "Perform OCR" button and we will convert the file into one ready for editing. Click on "Edit" and you can edit the PDF file. We can skip this step if we do not want to edit anything but it is important to know that we have this option available. Now there is only save the PDF by clicking File> Save As. We add a name and that's it.
This app has a free trial option So if we like it, we can buy it later.
[Bonus] Convert photos from .HEIC to .JPG format easily and quickly
One of the options that we also have available on Mac and that allow us to change the format of the photos taken with the iPhone is to go from .HEIC to .JPG format. In this case.HEIC is a format that allows you to add sounds, text, values, and other options. That is why it is so easy to edit an image taken with the iPhone camera and it also adds transparency and 16-bit color.
The problem with this format is that many times we have problems using the photos taken once they are downloaded to our Mac. It may be that other users cannot open the photos or even that they cannot be sent directly. For this reason, today we will see how to go from this .HEIC format to .JPG without the need for any third-party application.
For this we will use Preview again. Once we have the image open in this great tool and we verify that the image has been taken in .HEIC, what we have to do is directly access File at the top and look for the export option. A pop-up window will automatically open and we will see this:
- Image Name
- Location where we want it to be exported
- In the Format field we select .JPG
- In addition to all the above, we can set the image quality
- Finally we click on "Save" to apply the changes
In this way we have the image already passed to .JPG format and later we simply have to delete the previous one. In this case the new image format does not directly replace the previous one, it simply creates a new file with the image that we can use when and where we want. It is usually stored on the desktop but we can easily choose the place in the drop-down. That easy.