The digital certificate allows you to access official websites and others such as banks, but did you know that your DNI also allows it? We teach you how to install an electronic ID reader on your Intel Mac or M1 and how to use it.
What is the electronic DNI for?
For some years now, all of our ID cards have included a microchip where our digital certificates are stored. These certificates are equivalent to those that we can obtain on the FNMT website and install on our computer, iPad and iPhone, as we explain in this link. The difference is that while the digital certificate is installed on a computer, and there it stays, the electronic DNI is always with us, we use it and it leaves no trace on the computer that was used, so that no one can use it without your consent. Even if someone got hold of your ID, they would need to know your password to be able to use it.
Requirements
The first thing we need is our electronic ID, activated, with valid certificates and password. The electronic DNI certificates expire every two years, so you will probably have to renew them. The DNI password came in an envelope that they gave you along with your new DNI, and you probably have no idea where it is. So you will probably need to go to any police station where the DNI can be issued and use the computers that are enabled to recover the password and renew the certificates.

you will also need the electronic ID reader. You have many models, I have decided on the ChipNet model (€ 29,90 on Amazon) for many reasons:
- USB-C connection (comes with USB-A adapter)
- Compact
- Compatible with macOS with M1 and Intel processor
This reader model requires software that you must download from its website (http://chipnet.es) and install on your Mac. It also comes with very detailed instructions, which are the ones I used for this tutorial.
Finally you will need to use Mozilla Firefox (link) because it is the only browser compatible with the electronic DNI. It is not a limitation of this ID reader, but of the system itself. The entire configuration process must be carried out in Firefox, and every time you want to use the DNIe you should also use that browser. I have tried with Safari, and with Chrome, and the results are generally bad, so it is better not to risk it.
Configuration
We already have everything prepared and downloaded. The first thing we are going to do is install the ChipNet software. macOS will surely tell us that the file cannot be opened, so we will hold down the Ctrl key while right-clicking on the file, and the Open button will appear enabled. We install following the steps indicated and without changing any of the options that may appear. Once this is done, we can insert the reader into the USB of our Mac and open Firefox. It is recommended that every time we want to use the DNIe we restart the computer with the reader already in place, it is not essential, but sometimes it will not work if you do not do it like this.
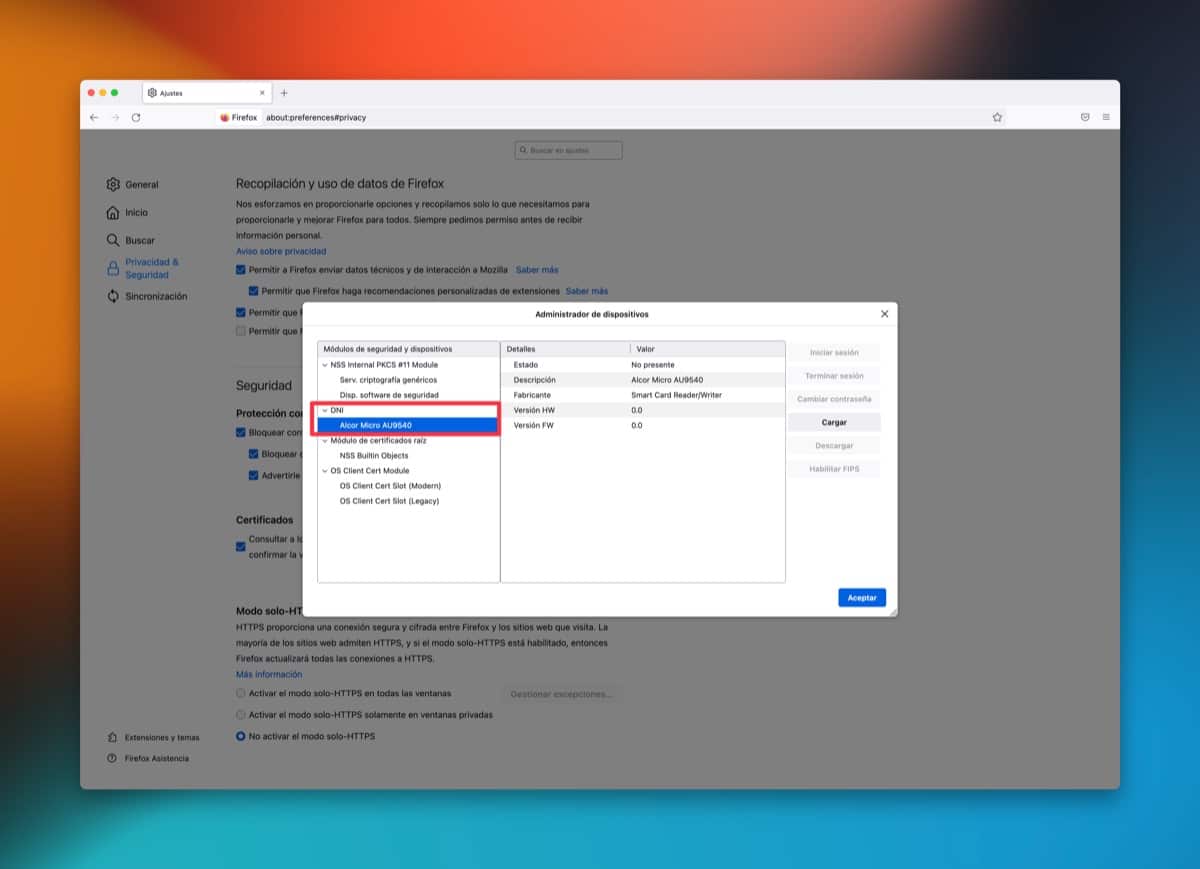
We open Firefox (the reader must be inserted) and go to the path “Firefox> Preferences> Privacy and Security> Certificates> Security Devices” and click on the “Load” button. In the first field we insert “DNI” and in the second field we must paste the following route:
We accept this window and we should already see the reader in the window, as I show you in the image. Now we insert our ID in the reader and the “Start Session” button will appear enabled, we press it and write the password of our ID. If everything is correct, you will be logged in without any problems. and it will be a sign that everything works as it should. A single check that is not essential but that we can do to make sure that everything is correct: go to the path “Firefox > Preferences > Privacy and Security > Certificates > View Certificates” and check that you have the certificate of your electronic DNI (the DNI must be inside the reader).
Use the electronic ID
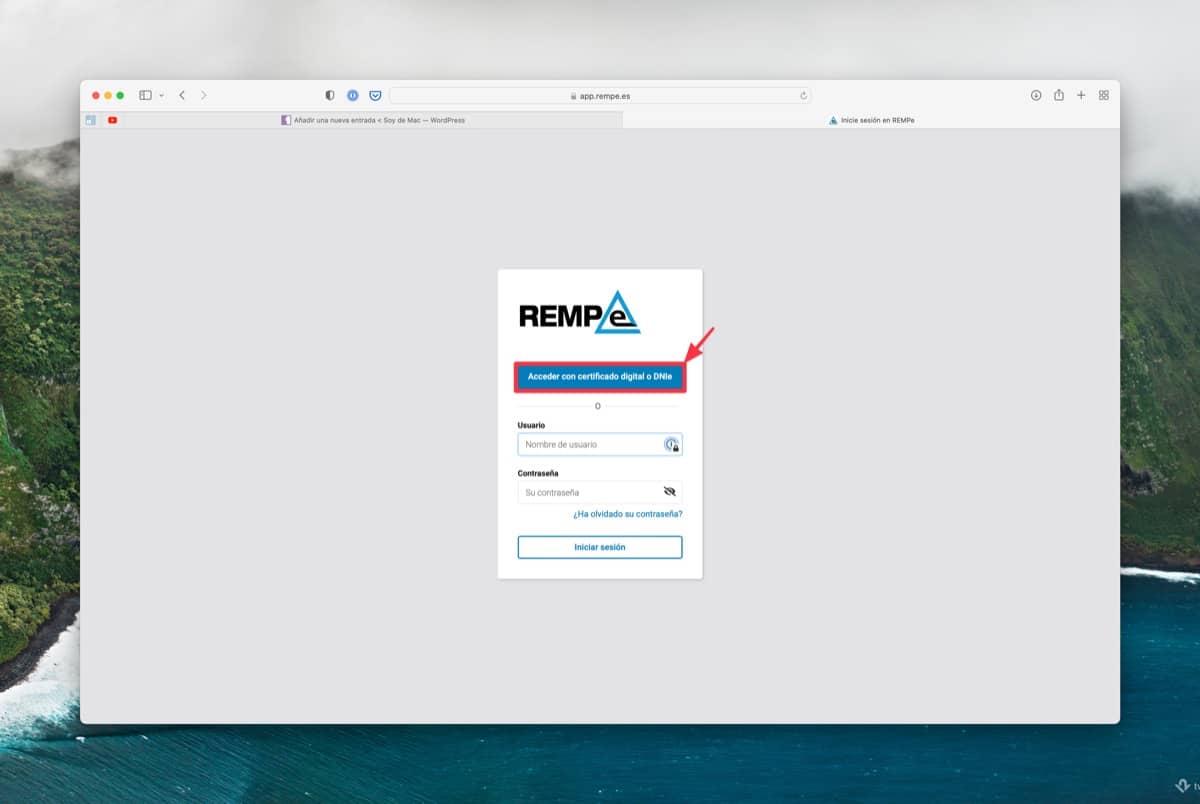
As we indicated before, to use the electronic DNI, it is best to turn on the computer with the reader already inserted in the USB. We place our ID in the slot of the reader, always with the chip facing up, and open Firefox. We can navigate to the web that we want, if the electronic DNI is included among the access modes that it offers us, then we will click on that option and A window will appear to write the password of our ID. If it is correct, we will enter the web and we will be able to carry out the pertinent procedures.
Very good article, very useful. But when I try to add the device or load the device driver, I put in the module name and the module file name and I get an alert that the module cannot be added, without further explanation. I'm trying it on a MacBook Pro running Catalina 10.15.7. Could you guide me what solution I would have since I need to use the DNI-e and I thought that this was a good way to do it. Thank you very much
It gives me an Alert "It is not possible to add the module" when putting. /Library/Libpkcs11-fnmtdnie/lib/libpkcs11-fnmtdnie.so