
Now OS X Yosemite seems totally innovative and with a renewed air that brings a bit of freshness to the system after so long with a similar appearance in terms of icons and system layout, it does not mean that there is not a group of users that is already out of nostalgia or to give a more personalized touch to their system, they want to keep the features of OS X Yosemite but with an appearance like that of the Macs of more than 20 years running on System 7.
PREPARATION
This system was the best that existed at that time, to give you an idea, the machines that ran it they only counted with a CPU at 33 Mhz speed or less. Now with this little guide we can give an aspect to OS X Yosemite of the most similar.
The first thing would be to adjust a series of display parameters in System Preferences that will serve as the basis for conversion:
- General: We will change the Appearance from Blue to Graphite and Highlight Color, Graphite as well.
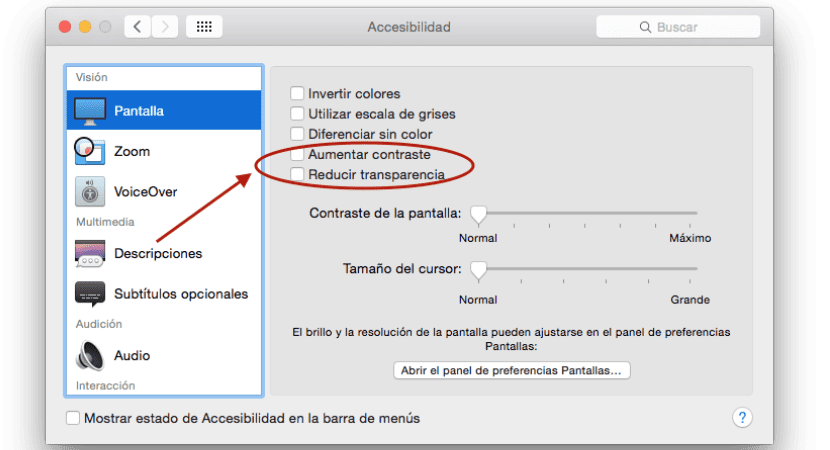
- Accessibility: We will mark Reduce transparency and Increase contrast.

- In Desktop and Screensaver> Desktop, select solid colors and then Medium gray
CONVERSION TO SYSTEM 7
The important thing here, once the colors and Yosemite desktop have been adjusted, is the icon pack to complete the effect of being in front of System 7. Actually, we have different icons from both OS 8 and OS 9 but the one that actually Interested in this guide would be OS 7 or also known as System 7.
Through the following links we can access the complete download of the icons:
At this point we can decide whether to carry out a complete conversion with all the icons or simply change some of them at our choice, if we want to changear only the one of a few icons individually we will proceed as follows:
Select any element you want to change, such as its icon on the main disk or a folder, with the right button (CMD + Click) we will click on «Get information» and that is when we will be able to see the icon in the upper left corner from the window that has appeared to us. In this case we will look for the icon that refers to the pack that I have left in the upper links, simply by dragging it to the location of the other, the exchange will be made automatically. We can do this for as many icons as we want.
On the other hand, if what we want is to convert each and every one of them to those stored in the system, we will have to move to the Finder menu «Go» and select «Go to folder» to enter the following path:
/System/Library/CoreServices/CoreTypes.bundle/Contents/Resources/
Here we will see all the system icons, being able to collect the ones that we have downloaded from System 7 and rename them to make them coincide with the system icons and be saved by referencing the ones we have just replaced. Of course, first of all it is advisable to make a backup copy of the folder and if we can the entire system with Time Machine.
To finish the conversion we should mark that the Dock is automatically hidden in System Preferences, and eliminate the toolbar in the new windows with the option "Hide toolbar" in the folders title bar. With this we would already have our new Mac with a vintage air of the coolest.