
It is possible that, on some occasion, you have thought if, instead of having to read the texts from somewhere, there would be a possibility to make your Mac read anything to you, to be able to dedicate yourself to other more important topics at the same time, for example. If this is your case, you shouldn't worry anymore.
And it is that, from Apple, they include a function in macOS that, although it is oriented to the accessibility of the equipment, you can use it without problem, to achieve that read you any text you want at a certain time, In a simple way.
So get your Mac to read you a certain text
As we were saying, if you wish you can make your Mac read a text to you, although for this you must first have the reading option activated within the preferences of your computer, since if not, it will not allow you to execute the combination of keys required. Thus, To activate this function, you just have to follow the following steps:
- On your Mac, open the application "System Preferences". You should be able to find it from the Launchpad, although if you can't find it you can always run a Spotlight search to get straight to the point.
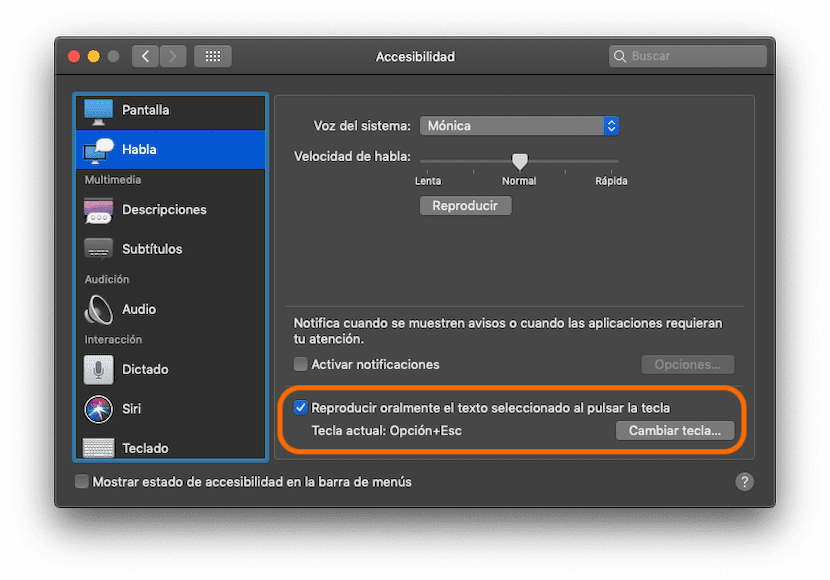
- Once inside, in the main menu, go to the option called "Accessibility" and, when you are inside, on the left side, where you will have all the different options that Apple gives, select "Speak", within the field of view.
- Here, the first thing that will appear to you, will be the voice you want your Mac to have. This is something that depends on the accent of your country and the language in which you have configured your Mac. By default, in Spain only two voices appear, Jorge and Mónica. You can try them all to see which one is the most comfortable for you.
- Then, the really important thing comes, and that is that you should activate the option called "Orally play the selected text when pressing the key". With this everything should work for you.
- Anyway, pay attention to the key combination that will appear below, which this time by default is to press the Option key (Alt) together with Esc, although if you wish you can modify it, but that if, make sure to remember it since you will need it later, every time you want your Mac reads something aloud to you.
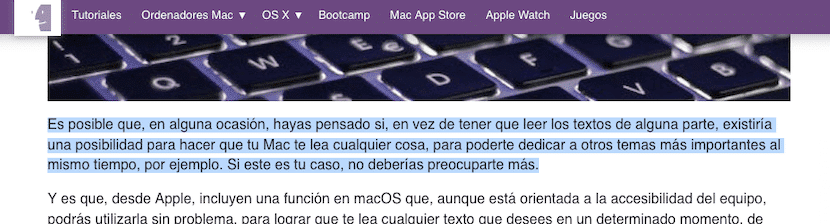
Once you have done this, all that is left is easy. First, find the content you want your Mac to read to you out loud (you can try the text of this article if you wish). You just have to select it with the mouse and, when everything you want me to read to you is marked, that's when you should press the Option key (Alt), along with Esc, or whatever you have previously configured, if you have modified it. Of course, try to mark only the text that you want him to read to you, except for advertisements and this type of thing, since if not, he is likely to get confused and read you things that you really do not want to hear.
Be that as it may, although only a small blue mark will be shown in the toolbar menu if the application is compatible, the text you have selected should start reading out loud immediately, using the voice you have selected from settings.
Improve reading quality
If you notice that the voice with which the texts are read is outdated in terms of pronunciation, or that the voice is not heard with too much quality, it may be because your Mac has downloaded the basic package of the voice you have chosen , or that it is outdated. If this is your case, you just have to go to the "System Voice" section, which we have accessed before, and then, in the drop-down, choose the option to "Personalize…". You just have to choose the voice you like the most and click on the accept button, and automatically will start to download in high quality.
Super useful information. While I have yet to test how it works, I just wish it would help me!