
Surely, on more than one occasion, the following has happened to you: they have sent you a form, a document or a contract by email that you must return signed. The most common is that we proceed to print the document in question and scan it and then send it again with our signature. But, do you know that you can do it digitally without many steps involved? You know what the «Preview» application on your Mac will allow you to enter your signature on documents through two tracks?
Much is said about mobile applications that allow us to sign directly, on screen, the documents that come to us on the iPhone or iPad. However, if all this happens at home, in front of the computer, it will also be possible with a few simple steps. What's more, the best of all is that you can save that digitized signature for future documents. Let's look at the steps to sign a PDF with Mac Preview.

The first thing you should do is download the document in question locally; that is, host it on your hard drive. Once downloaded, click on it with the right mouse button —or ctrl+trackpad- and open it with Preview. The second thing you should do is enable the entire function bar of the program. And this must be done from the "View" section of the Preview menu bar. Once inside look for the option "Show markup toolbar". You will see that suddenly more options appear on the image or document.
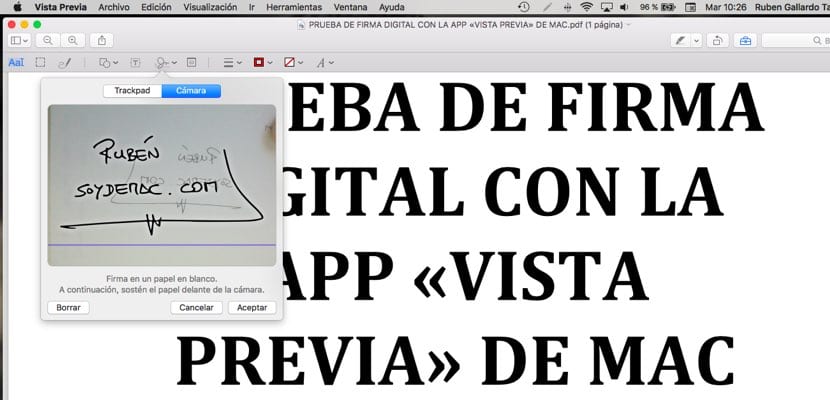
It will be time to start practicing our rubric; you will have to go to the icon in the form of a doodle - the sixth one from the left - and click on it. At the moment a new window will open where you can choose whether to create your signature using the trackpad —If you don't have a pulse, it's not the best option— or use the Mac camera. In this second option you must make your signature on a blank paper and with a black ink pen.
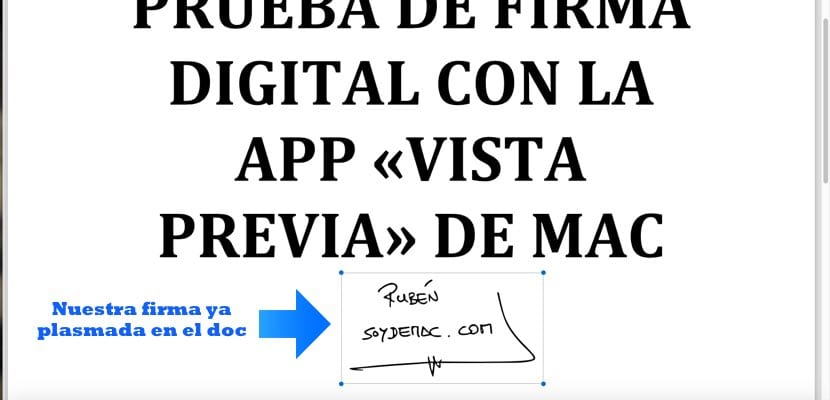
Then he stands in front of the Mac's camera; the signature is above the blue line that appears in the window. After squaring everything in front of the camera, you only have to press any key to accept the signature. From then on, you can save that signature for all future documents.