
Nowadays productivity is basic to all of us since we always lack hours a day to do everything we want. Automator is losing prominence with the passage of time and the new simpler applications that we find in the Mac App Store, but there are really interesting options that we can continue to take advantage of.
Many times we want to resize a photo so that it occupies less size and we have a very simple option for it with Preview that allows us to carry out the task with almost no mess. But if we have to resize photos more frequently and more, Automator can be our solution with this simple workflow.
To make it easier, we will perform this workflow in steps. It is very simple and we can add that it also passes them to JPEG directly but if you want we can see it another day, today we focus on correct the size of the photo to the pixel size that we want or even by percentage.
Create a folder and workflow
This is the first step we have to take, so the first of all is create a folder on the desktop with the name that we want so that this workflow is carried out. In this case we have called it Size Photos, but you can put whatever you want. Now we can open Automator and start the task.

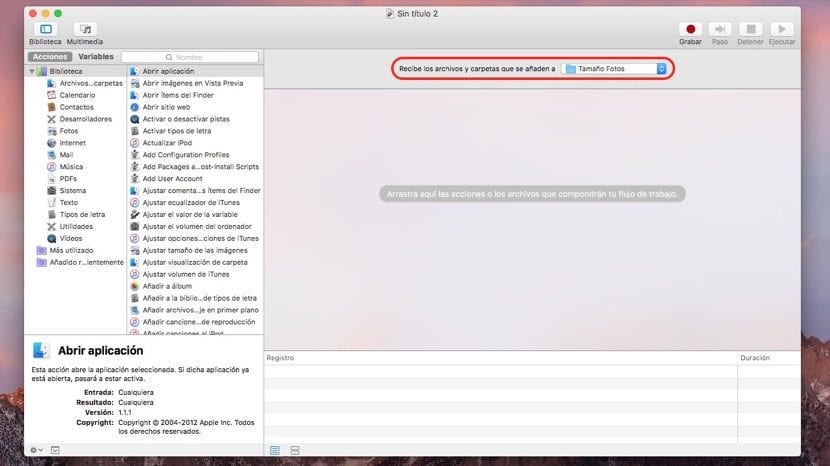
Once Automator is open we have to select the Folder Action option (that is why we created the folder previously) and click on To select. Now we have to click on the option that says: Receive files and folders that are added to: Other, so we open the drop-down and select Other. We choose the folder on our desktop Size Photos and ready.
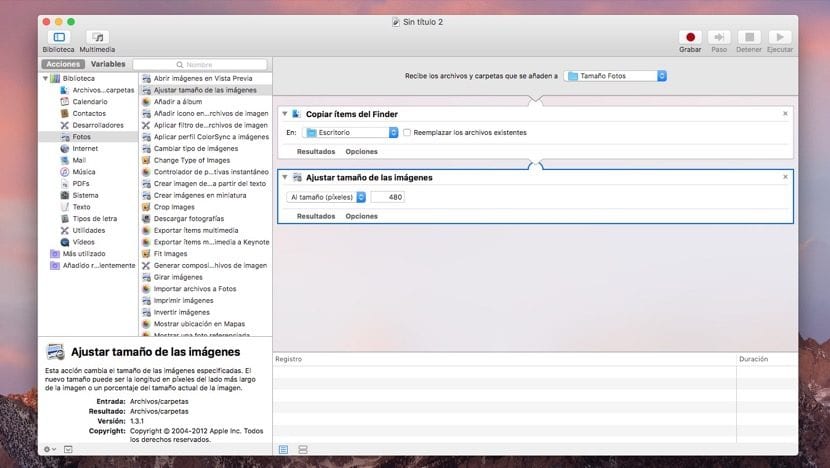
Now we will see that it appears directly in the menu and we can continue with the next step. These are the simplest and we only have to choose the option Photos in the left column y adjust image size. In this step when we carry out the action of adding «Adjust size of images» another option appears automatically which is «Copy items from Finder»To this we mark the option Replace existing files and it will not duplicate photos, but if we want to keep the original then we leave it unmarked in the folder (Photos Size) the original file will be saved and on the desktop the modified to the chosen size.
A simple process that makes us more productive when we have to resize many images at the same time.