Many of you have told me that you liked the mini Time Machine tutorial that we did before. So we present a new tutorial on how to make backup copies of our mac remotely.
Anyway if you want to see the first of the two tutorials posted here you have the link.
We all know how easy it is to have a Time Capsule to make backup copies of our mac without worrying about anything, since as you know, time Capsule can be configured to make a copy every 5 minutes, and so in case of catastrophe we will always have all the information safe.
If you like the idea of Time Capsule to be able to perform remote backups and comfortably for more than one device, but you do not want or cannot buy one, there is a very simple way to create our own homemade "Time Capsule".
If you do not know how this task is done, do not hesitate to read this tutorial that we will explain step by step.
Steps required on the server side
The first thing you should do is use a disk to be able to make backup copies, remember that if it is a whole hard disk for this function much better, since if you use it for other uses, it sure falls short.
Once this step is done, we have our hard drive connected and working correctly, it is time to configure our Homemade Time Capsule.
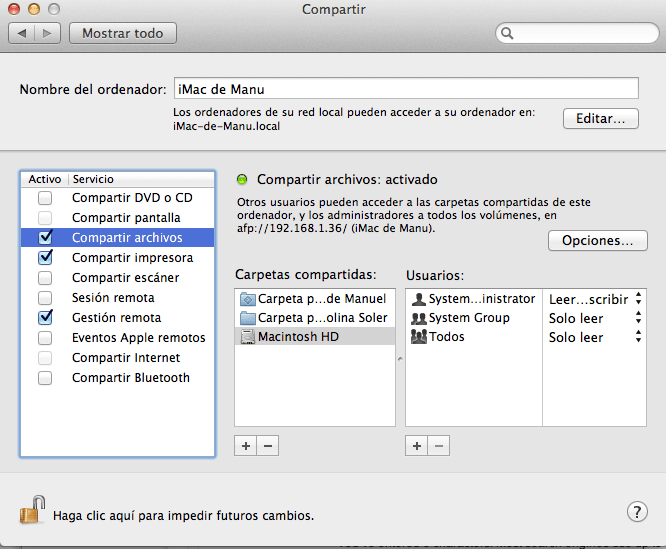
Opens System preferences and access the folder named Share.
Once inside, access the File Share option as marked in the image above, and press the button + de shared folders, located in the sidebar of the window.
If you are very meticulous about those who are going to make the backup copies, you can add registered users to be able to make the copy, since in this way, the information is a little more secure.
Setting up Time Machine
Once all these steps have been carried out, we must change computers, and go to the computer you use to access the backup copies remotely.
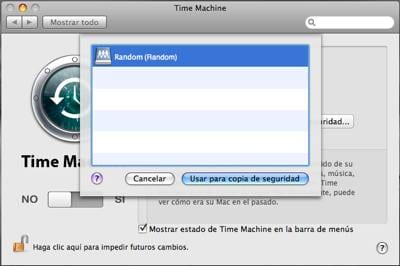
Same steps as before, access System Preferences and now Time Machine.
Click on Select disk…. and we will have to wait for Time Machine to connect to the disks that we have connected to the network.
To know which is the correct disk, you have to set the name, since this indicates the team that shares that volume.
Possible errors: my HDD drive does not appear
It is normal sometimes that hard drives that are shared from another computer are not accessible from another machine. To do this we show you some simple tricks so that you can solve this small setback:
1. Try directly accessing the disk from the Finder. Access the computer remotely and mount all its volumes with the administrator password.
2. If you still cannot access the remotely connected hard drive, try this last trick: From the terminal try to execute this command line (but without the quotes):
"Defaults write com.apple.systempreferences TMShowUnsupportedNetworkVolumes 1"