
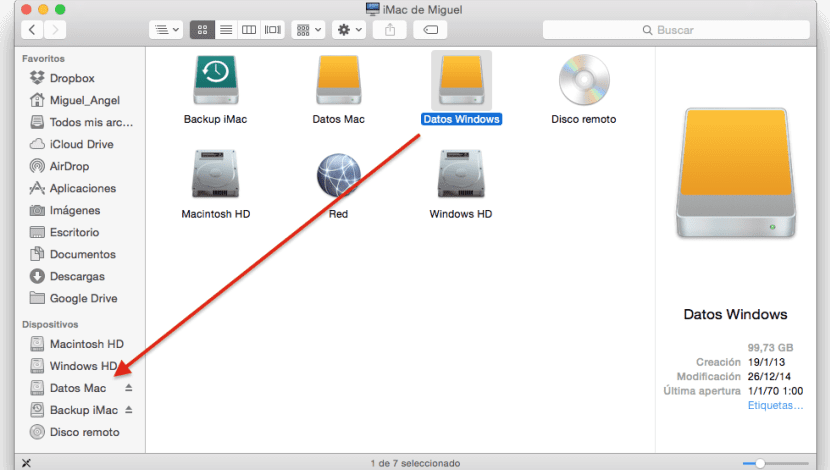
The Finder sidebar is a great location to access different sections of the system of those that we make frequent use, such as hard drives, different folders in our personal directory or simply shared network resources or other personalized sections that we drag to said bar. In this case if we use the sidebar for purposes like access storage drives, then there may be times when certain units do not appear while others do.
The most likely reason for this is because that particular drive has been removed from the sidebar previously. Despite the fact that the Finder has a sidebar that can be adjusted to globally activate or deactivate the storage units that appear there, there is a gray area where only some of these enabled items will be shown, this occurs when elements are selected and dragged out of the sidebar manually.
When this occurs, while other units will display normally upon plugging in, the unit that was previously dragged off the bar will not display regardless of whether you disconnect and reconnect. While this can be an advantage in some cases, it is also a disadvantage when it comes to recognizing whether the disc is properly mounted or unmounted in order to eject it properly.
At this point there are two possibilities:
- Relocate the unit to the sidebar: We will open a new Finder window and then press SHIFT + CMD + C to display all system resources, both network shared drives and locally mounted disks. If the disc that is not displayed in the sidebar appears, simply drag it to its original location.

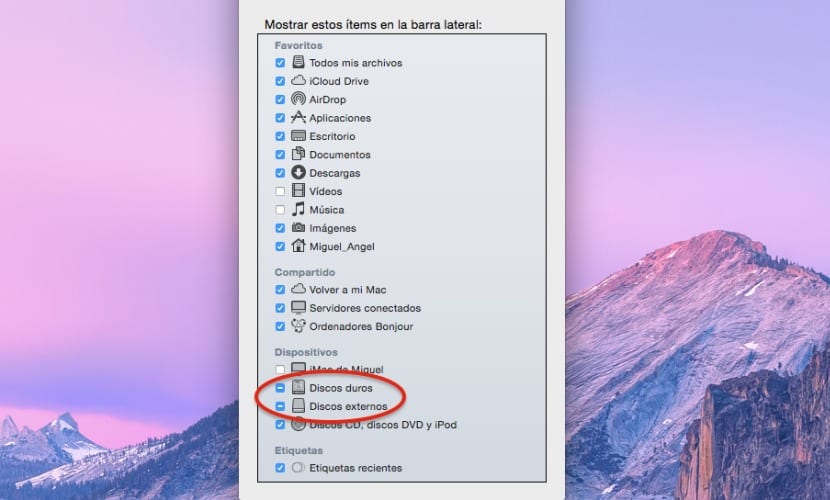
- Reactivate the option in Finder preferences: If instead of a single unit, we see that several are not shown. We will have a faster option to achieve our goal, we will move to the Finder preferences section in the top menu, where we will see a box for external hard drives and those internally connected to the Mac, if we see a script it is that they are partially enabled, The next step is as simple as unchecking and re-checking these options so that a verification check is displayed correctly.

Many thanks. This has saved me. I couldn't load video raws from an external drive into my video editing program.