We continue in Applelizados unraveling the secrets of all the news that iOS 10 has brought us to our iPhone, iPad and iPod touch. Specifically, the new functions and features of Messages, an app that has been renewed from top to bottom offering a new and impressive communication experience.
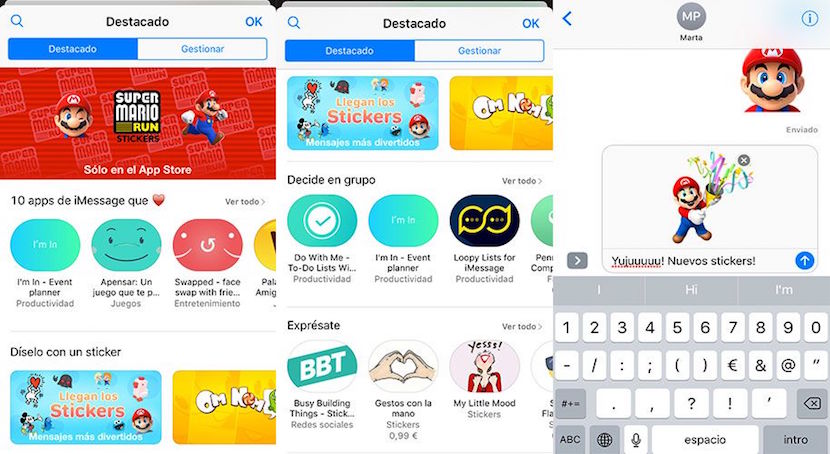
In the first part of this post we got into the stickers. We hardly saw what they are, their basic operation and how to install sticker packages. Now comes the best, so don't miss it.
Customize each stickers you send
The good thing about stickers is that they can be superimposed on incoming text messages, photos, GIF files, the "stickers" themselves, or others. With that you can express reactions to content your friends send you.
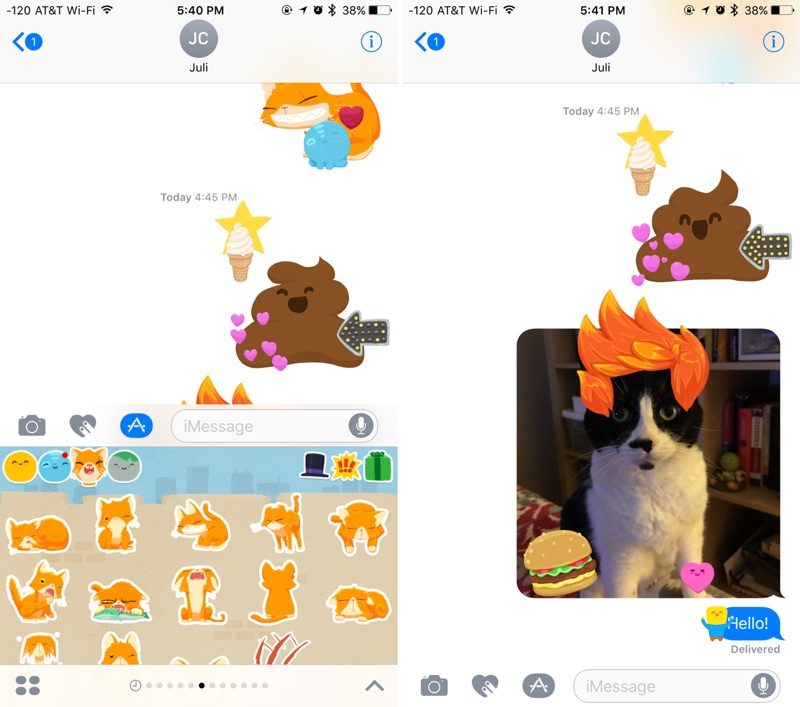
The stickers must be placed in a chat bubble, cannot be randomly placed in the message field. Also, you can only superimpose one on top of the other when the first one has been sent. Since you cannot include multiple layers of stickers at the time of writing a message.
To overlay stickers:
- Navigate to the sticker pack you want to use.
- Select one of them but, instead of touching it, drag it to the message bubble where you want to place them. That simple
You can place as many stickers as you want on a photo or on an existing sticker. So together you can decorate the same image sent, for example.
It is also possible resize and rotate the position of stickers. This sometimes allows different or contrary reactions to be transmitted to the sticker itself.
To make a sticker bigger or smaller, as you drag it into the message field to drop it somewhere, place another finger on the screen and use the pinch gesture to expand or collapse.

If you wish to turn a sticker, you can do it the same way. As you keep a sticker on top of the screen, but before releasing it, use two fingers to rotate it and change its orientation. But remember, once you release it, you will no longer be able to edit it, so be careful.
Manage and remove stickers
To manage the stickers, you can use various gestures. With a single touch it will be displayed in full screen, just like if you use 3D Touch on iPhone 6s and later.
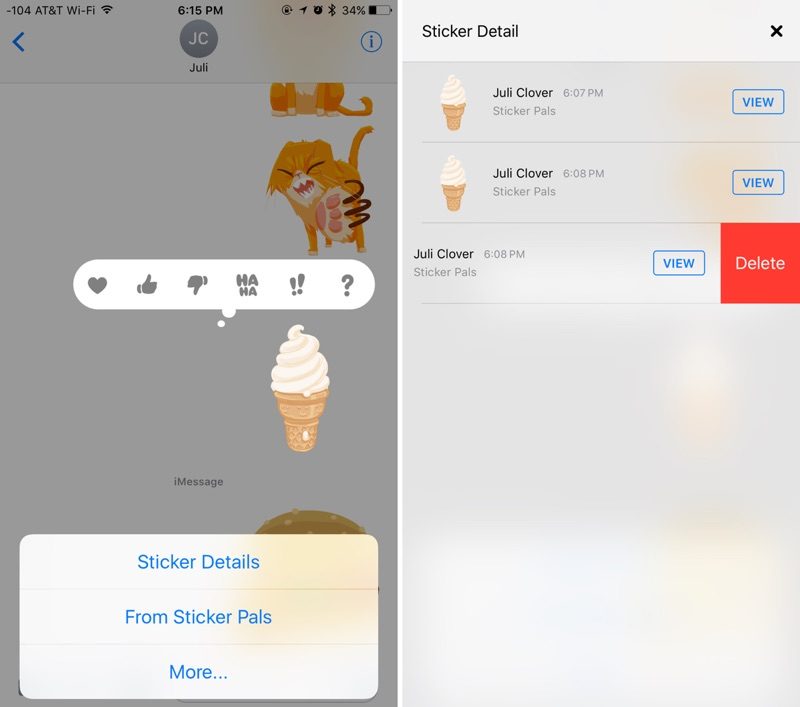
If you make a long press on the sticker, the options that allow you to transmit a reaction will open, as well as the management options. This menu will allow you to download the sticker pack from the App Store, if you don't already have it installed, and it will also allow you to remove the overlapping stickers.
To erase:
- Make a long press on a sticker.
- Choose the "More" option. All the stickers that have been placed on a certain photo, message, or the initial sticker will be displayed.
- On the label you want to delete, swipe left and choose "Delete." The sticker is removed from your device and the device of the person you sent it to and you can now add additional stickers.
Stickers compatibility
The stickers are only compatible with iOS 10 and macOS Sierra. Thus, any sending to contacts using older versions will not be displayed properly.
At the moment, the new Messages App Store does not include a huge variety of these stickers, however, this has just begun, and many developers are already at it.
If you want to know more about the new Messages and iOS 10 features:
- How to hand-send notes in Messages for iOS 10
- How to customize your favorite Contacts in iOS 10
- How to use the new iOS 10 lock screen (I)
- How to use the new lock screen of iOS 10 (II)
- How to use the new Messages effects in iOS 10 (I)
- How to use the new Messages effects in iOS 10 (II)
- How to install and use stickers in Messages for iOS 10 (I)